Tutorial sugli stili di colonna di Grasshopper

In questo tutorial, verrà creato uno stile di colonna parametrica da una definizione di Grasshopper.
I 3 passi principali sono uguali a quelli di qualsiasi altro stile di Grasshopper:
- Configurazione della definizione di Grasshopper.
- Creazione dello stile di scala di VisualARQ
- Inserimento e modifica di una colonna creata da uno stile di Grasshopper.
1. Configurazione della definizione di Grasshopper.
Prerequisiti da considerare durante la creazione di una definizione di Grasshopper per uno stile di colonna di Grasshopper:
- Le colonne in VisualARQ vengono create da un punto di inserimento. Questo punto di inserimento nella definizione di Grasshopper viene misurato dall’origine delle coordinate (0,0,0) del documento.
Scarica qui il file di Grasshopper usato in questo tutorial.
Digitare Grasshopper sulla linea di comando di Rhino per aprire Grasshopper.
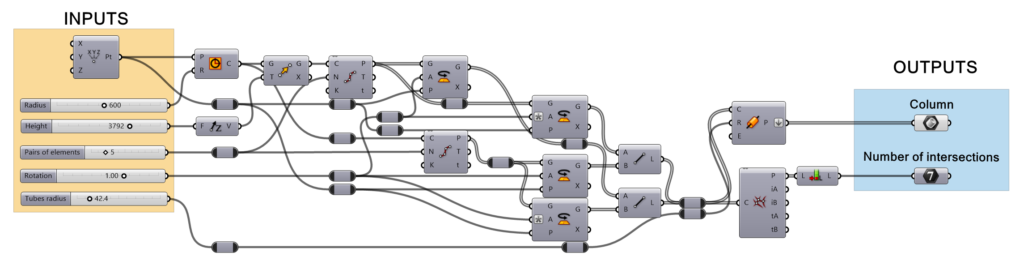
La definizione di Grasshopper richiede alcuni parametri di input per definire le funzionalità del nuovo oggetto e parametri di output per definire i componenti geometrici dell’oggetto finale. Alcuni parametri di output possono essere usati per recuperare le informazioni dall’oggetto creato.
- Parametri di input: Definisci le funzionalità dello stile che ne risulta. Questi sono i parametri che possiamo trovare in questa definizione:
- Valore numerico (punto mobile): tre cursori che definiscono varie dimensioni della colonna e uno che definisce la rotazione.
- Valore numerico (numero intero): un cursore che definisce il numero di coppie di oggetti.
- Parametri di output: Questi sono i componenti che verranno letti da VisualARQ una volta creato lo stile. VisualARQ riconosce solo i parametri di output che sono componenti finali con i nodi di output non collegati. In questo esempio, troviamo i seguenti parametri di output:
- Output geometrici: si tratta degli output che verranno letti dalle diverse parti della colonna.
- Brep param: geometria per l’intera colonna.
- Output parameters: these are used to retrieve information from the object created. In this example we can find the following output parameter:
- Integer Param: calcola il numero di intersezioni eseguite nell’oggetto finale.
- Output geometrici: si tratta degli output che verranno letti dalle diverse parti della colonna.
È importante assegnare un nome a questi componenti in Grasshopper per identificarli facilmente durante la creazione di un nuovo stile:
2. Creazione dello stile di scala di VisualARQ
Lo stile di Grasshopper verrà creato e gestito sulla finestra di dialogo delle proprietà degli stili di colonna.
2.1 Creare il nuovo stile
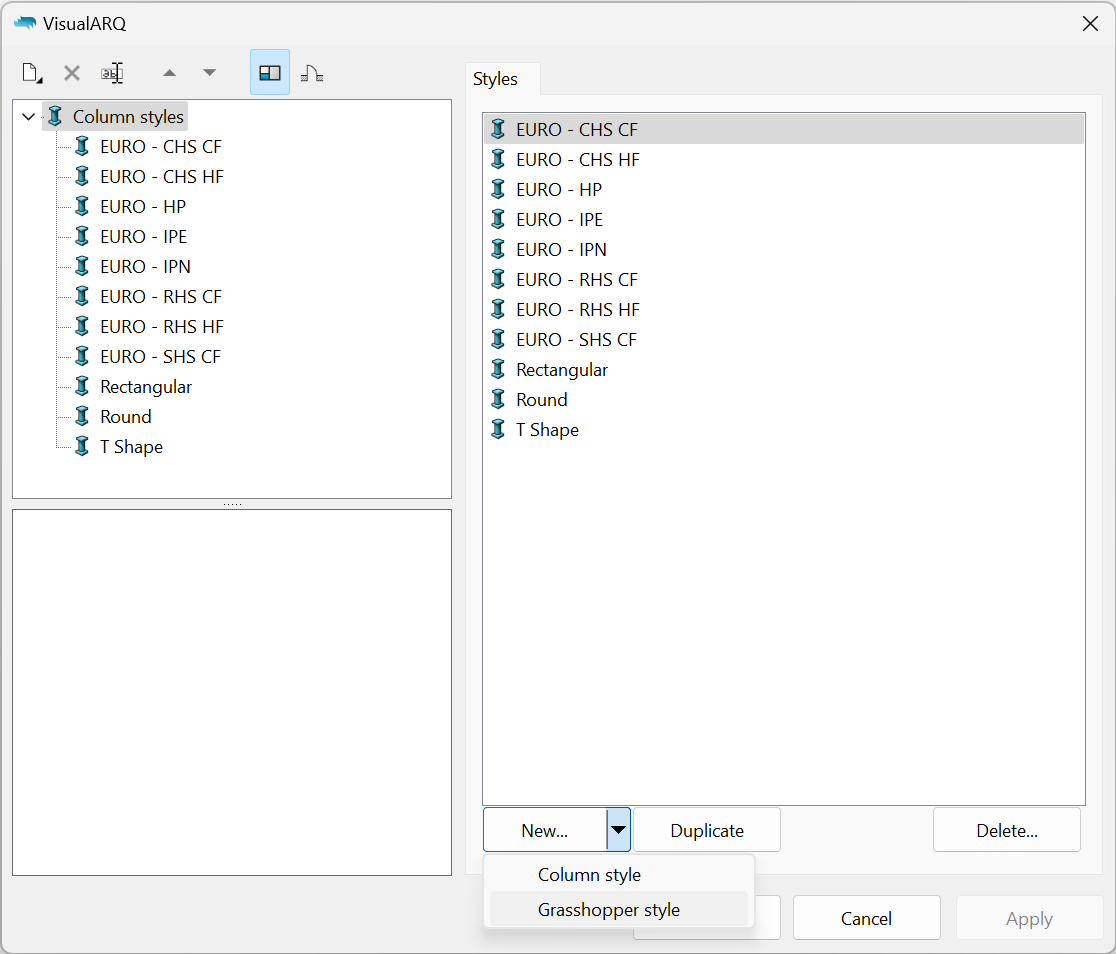
- Presupponendo di avere già a disposizione la definizione di Grasshopper (file .gh), apri la finestra di dialogo degli stili di colonna:
vaColonnaStilicomando. - Fai clic sul pulsante Nuovo… e seleziona l’opzione Stile di colonna di Grasshopper.
Apparirà la procedura guidata degli stili di Grasshopper . Questa procedura guidata ti consentirà di definire i parametri dello stile di colonna di Grasshopper. Una volta inserite le informazioni richieste, sulla parte sinistra della procedura guidata, verrà visualizzata un’anteprima dello stile oggetto creato.
2.2 Aprire la definizione di Grasshopper
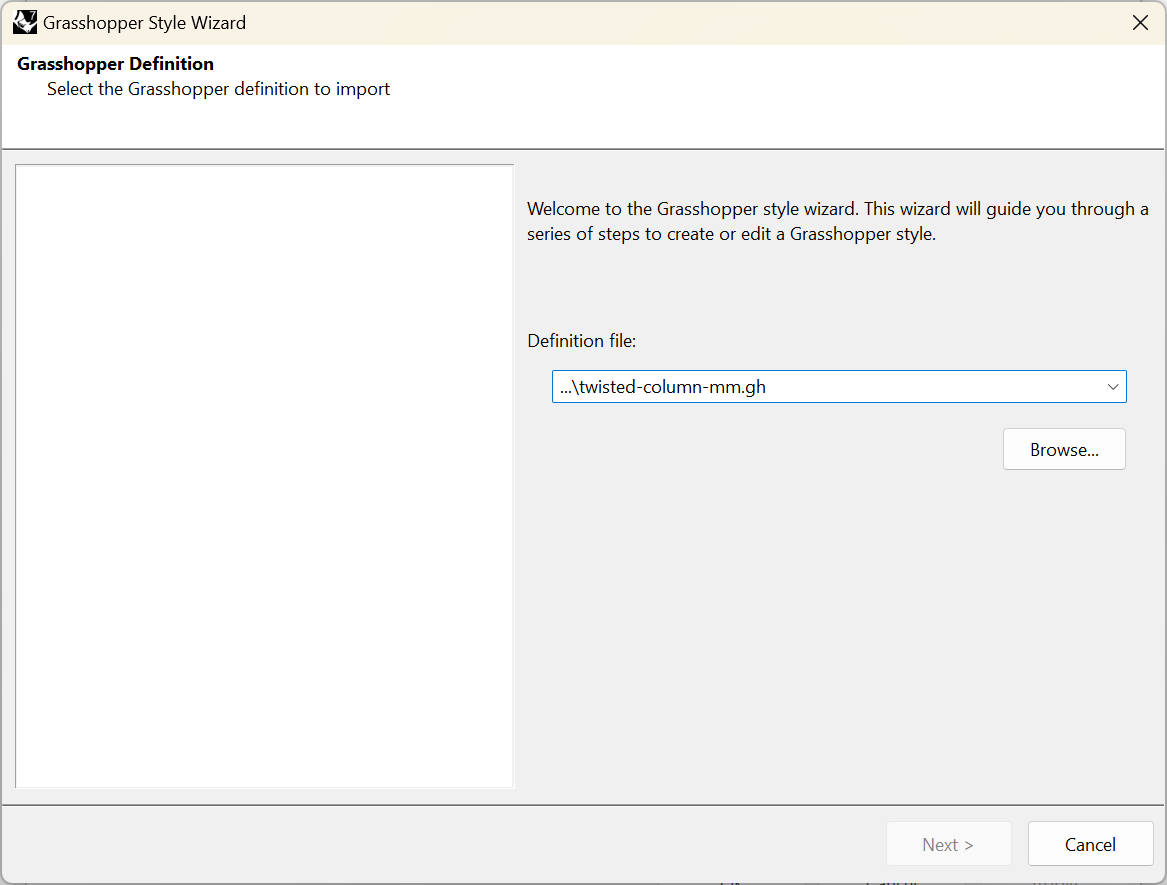
Fai clic sul pulsante Sfoglia per selezionare il file .gh o scegliere uno dei file recenti dall’elenco a discesa.
2.3 Configurazione
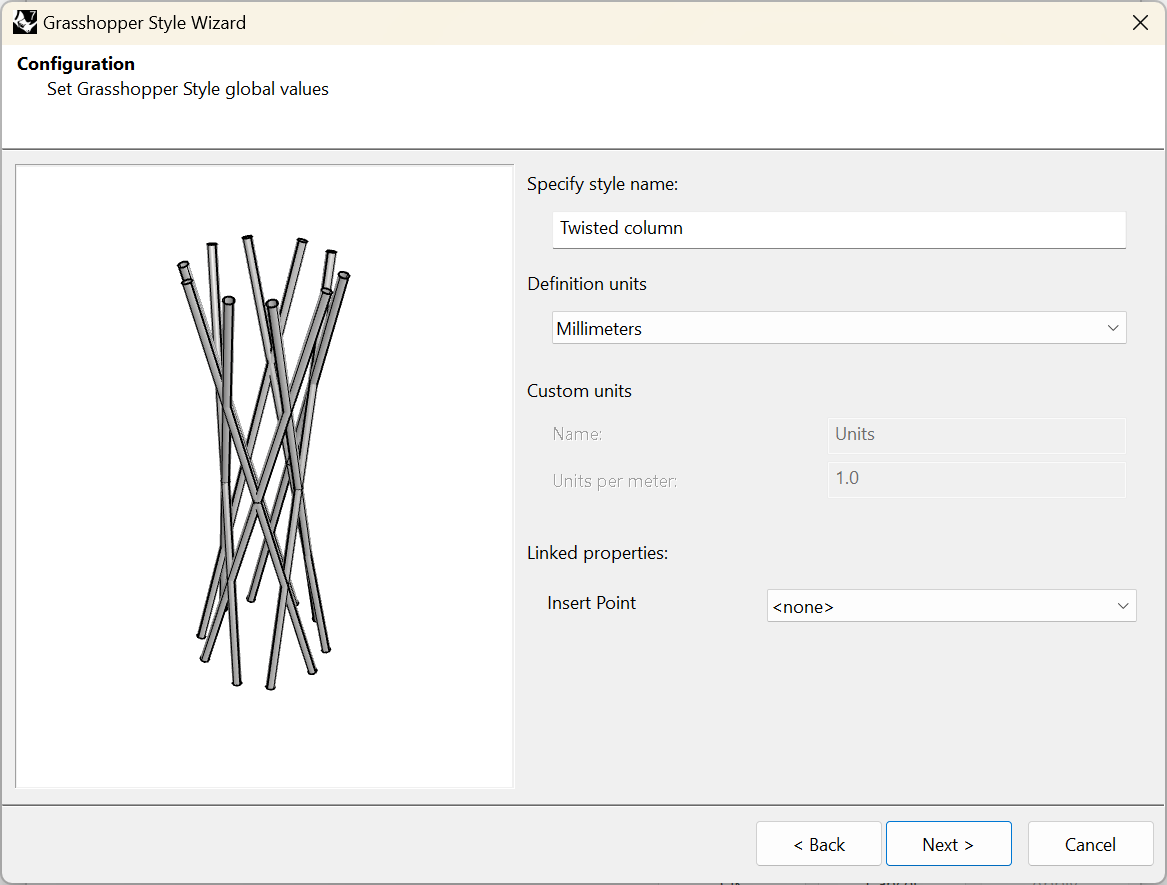
Impostare i valori globali dello stile di colonna di Grasshopper:
- Nome dello stile: imposta il nome desiderato.
- Unità della definizione: in questo caso, vengono usati i millimetri.
- Proprietà collegate: il punto di base per posizionare la colonna e qualsiasi parametro punto di input nella definizione di GH sarà disponibile qui. Se non vengono scelti i punti, verrà usata in alternativa l’origine della definizione di GH. In questo caso, la colonna è stata creata in base all’origine delle coordinate, per questo non occorre nessun punto.
2.4 Geometria
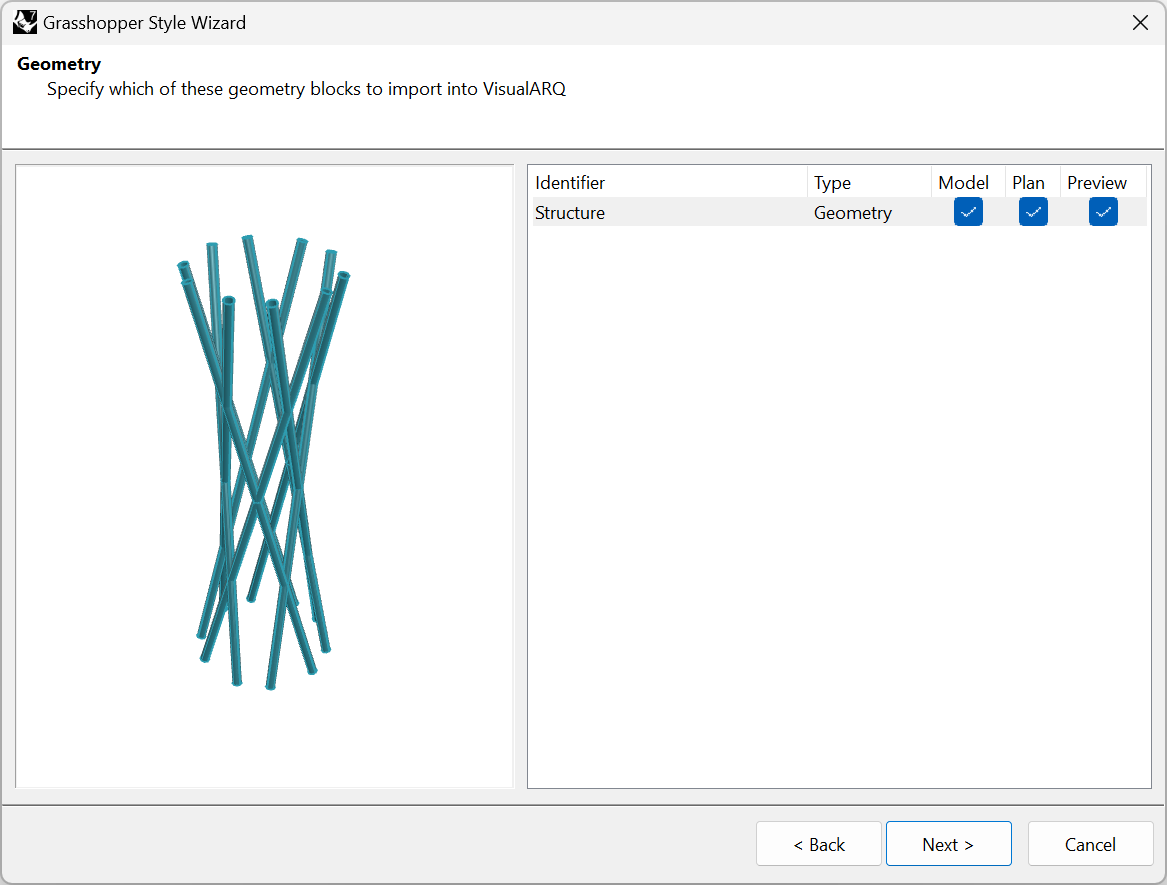
Specifica i componenti della geometria di output (Params) da importare in VisualARQ. Gli identificatori di questi componenti geometrici vengono presi dai nomi dei componenti di output geometrici nella definizione di Grasshopper e possono essere modificati solo una volta creato lo stile.
Puoi scegliere la rappresentazione in cui ciascun componente verrà usato:
- Modello: rappresentazione dell’oggetto in 3D.
- Pianta: la rappresentazione dell’oggetto nella vista in pianta. È visibile nella vista Superiore solo quando è attivo il piano di taglio del livello in cui è posizionato l’oggetto o quando interseca l’oggetto.
- Anteprima *: la rappresentazione dell’oggetto quando viene inserito o spostato in seguito. In questo modo, è possibile eseguire un’anteprima dell’oggetto finale prima di terminare il comando.
*Nota: Si consiglia di usare la rappresentazione Anteprima solo per la geometria necessaria va mostrare durante l’inserimento dell’oggetto nel modello. Tanto minore è il numero di componenti selezionati per l’anteprima, quanto più veloce sarà l’inserimento o la modifica degli oggetti nel modello, soprattutto quando vengono creati con definizioni di Grasshopper complesse. Mantenere selezionata almeno un componente con questa rappresentazione.
In questo caso, esiste solo un output di geometria che desideriamo mostrare in tre diverse rappresentazioni: modello, pianta e anteprima. Ciò vuol dire che la rappresentazione in pianta verrà acquisita dalla sezione orizzontale dell’oggetto 3D in base all’altezza del piano di ritaglio del livello.
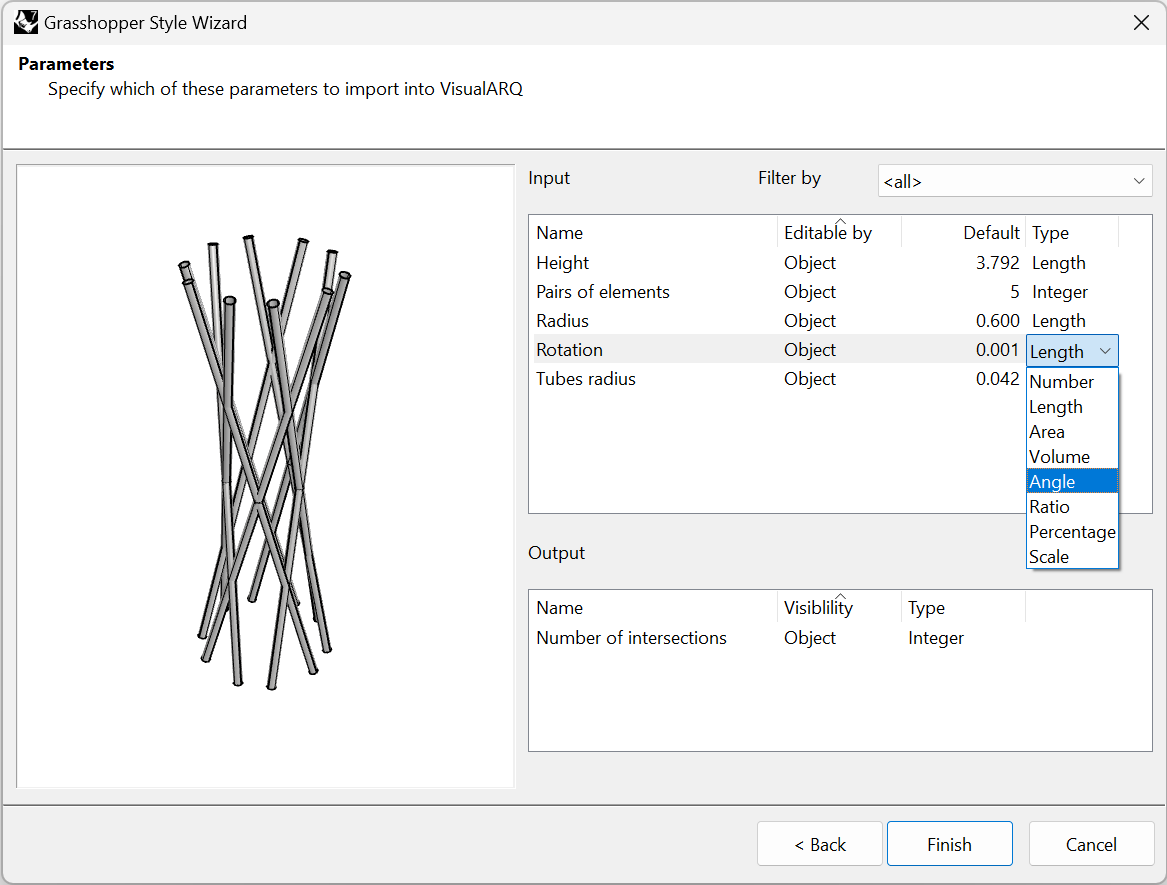
2.5 Parametri
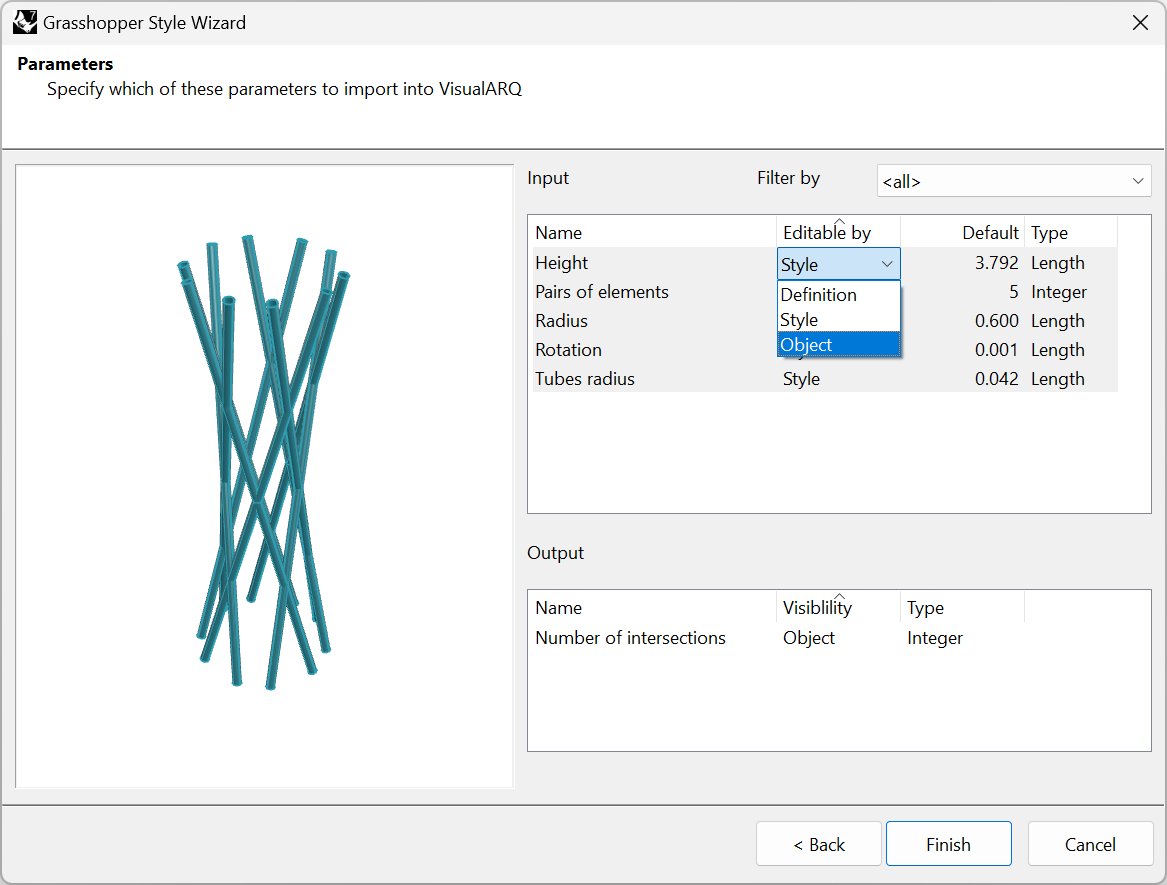
Questo passo mostra le impostazioni disponibili per l’elenco dei parametri di input e output definiti in Grasshopper. L’opzione “Filtra per” consente di visualizzare i parametri che si trovano nei gruppi con nome nella definizione di Grasshopper. Esistono due tipi di parametri:
- Parametri di input: questi parametri definiscono lo stile di colonna.
- Parametri di output: questi parametri recuperano informazioni dall’oggetto creato.
Le impostazioni sono diverse per ciascun parametro:
- Parametri di input:
- Nome: si riferisce all’identificatore del parametro e può essere modificato in questo passo.
- Modificabile da (puoi cambiare questo valore per alcuni parametri selezionandoli premendo il tasto Ctrl):
- Definizione: il parametro verrà nascosto e manterrà il valore dalla definizione di Grasshopper.
- Stile: il parametro può essere modificati in base allo stile e le modifiche verranno applicate a tutti gli oggetti nel modello con tale stile.
- Oggetto: consente di impostare un valore diverso per tale parametro per ciascuna colonna con lo stesso stile presente nel modello. Nel caso in cui non venga fornito nessun valore per oggetto, verrà usato quello definito per stile.
- Di default (valore): mostra il valore di default (specificato nella definizione di Grasshopper) per i parametri di input e consente di impostare diversi valori di default.
- Tipo: mostra i vari tipi di valori disponibili per ciascun tipo di parametro.
- Parametri di output:
- Nome: si riferisce all’identificatore del parametro e può essere modificato in questo passo.
- Visibilità: scegli l’opzione “Oggetto” per visualizzare questo parametro nelle finestre di dialogo di VisualARQ oppure “Nessuno” per nasconderlo.
- Tipo: mostra il tipo di valore precedentemente definito in Grasshopper per questo parametro.
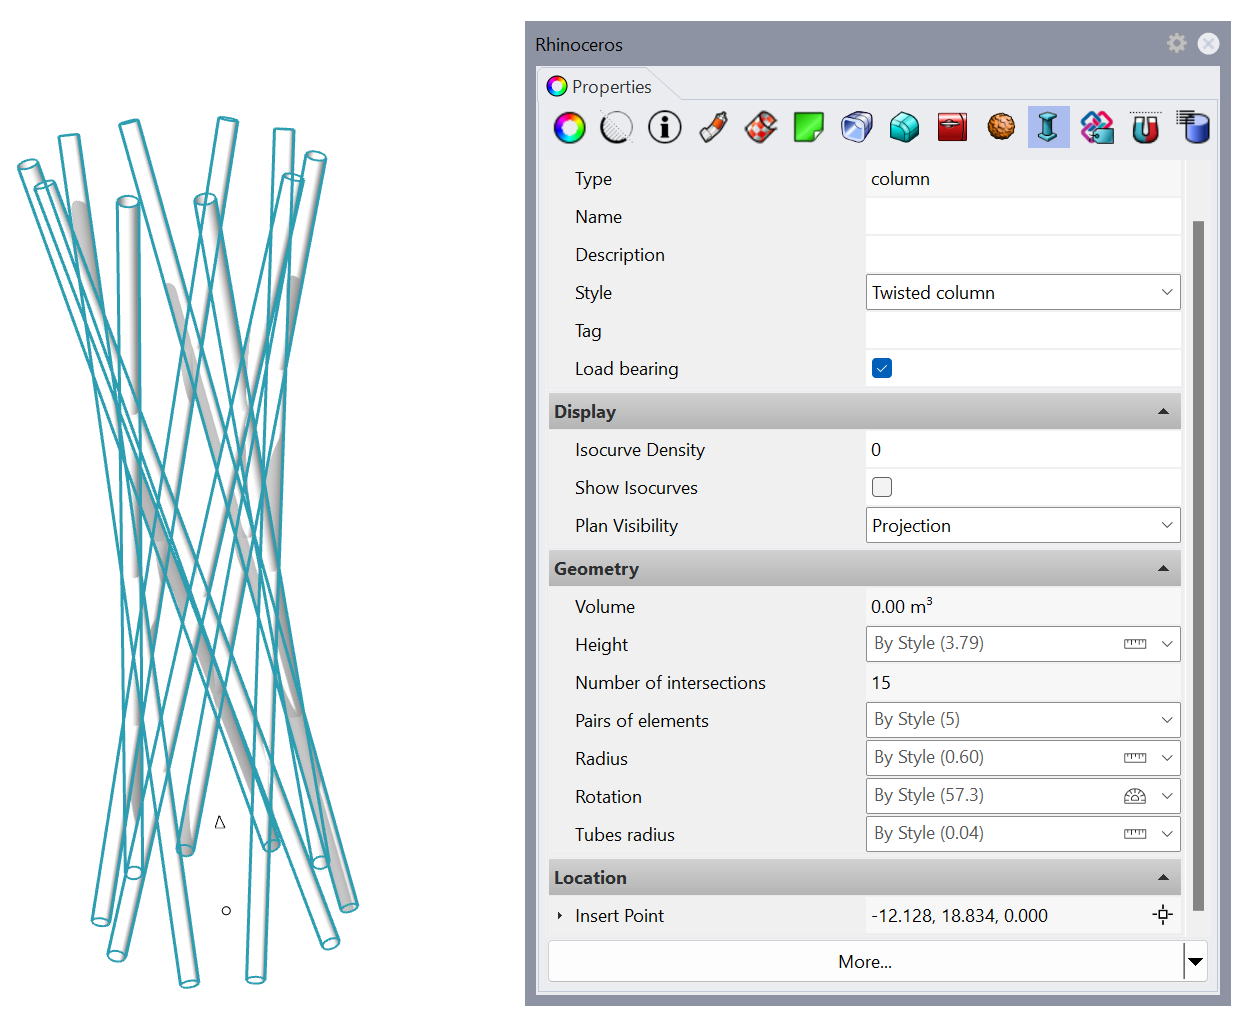
3. Inserire e modificare lo stile di colonna di Grasshopper
3.1 Modificare lo stile di colonna
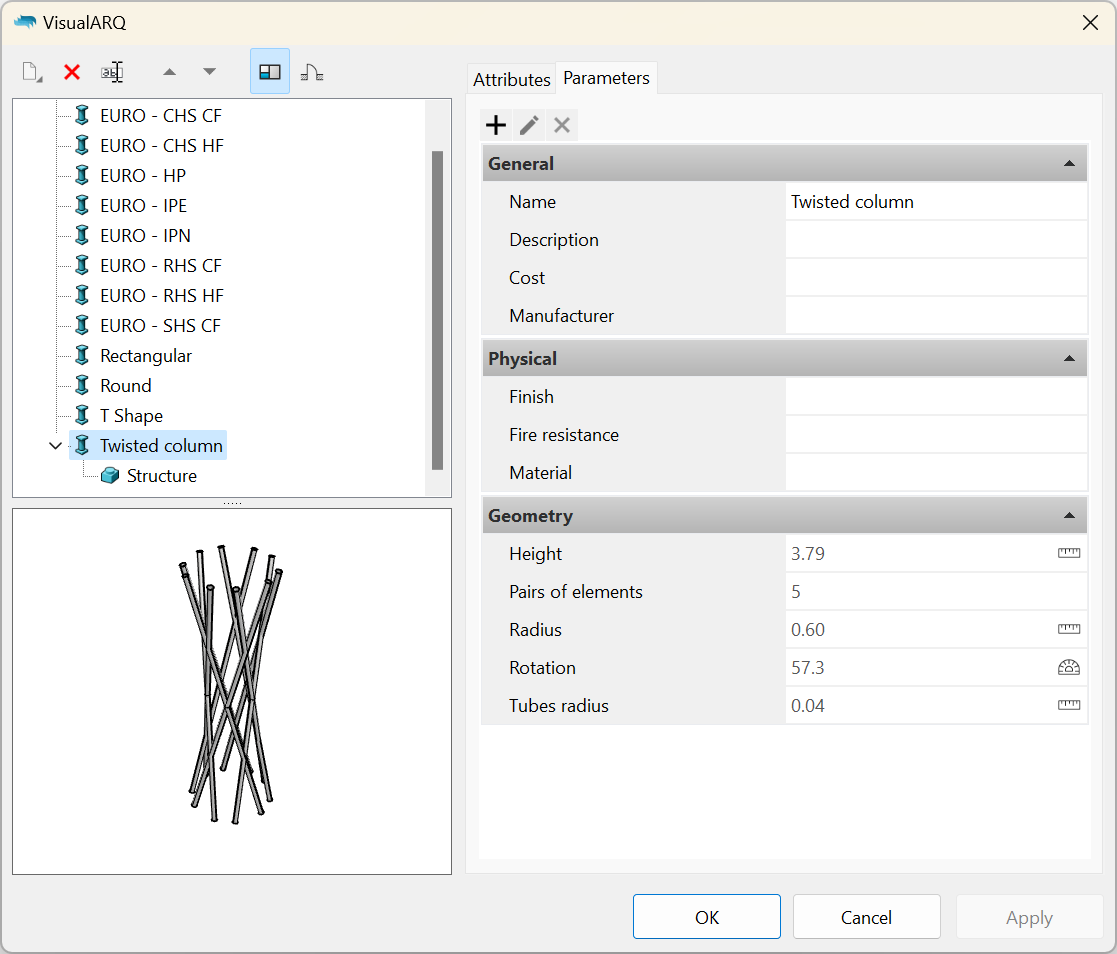
Una volta completata la procedura guidata degli stili di Grasshopper, il nuovo stile apparirà nell’elenco degli stili di colonna. Per modificare di nuovo lo stile, fare clic con il tasto destro del mouse sul nome dello stile per aprire il menu di scelta rapida, quindi selezionare Modifica. Questa operazione aprirà di nuovo la procedura guidata degli stili di Grasshopper.
I parametri sono disponibili sul pannello “Parametri” e appaiono raggruppati come nella definizione di Grasshopper. Nel caso in cui il nome del gruppo coincida con una categoria esistente, questi appariranno nella stessa categoria.
3.2 Inserire lo stile di Grasshopper
Una volta creato lo stile di colonna, potrai inserire un’istanza nel documento e cambiare i valori dei parametri dall’icona colonna VisualARQ, che si trova sul pannello Proprietà e che funziona come qualsiasi altro oggetto di VisualARQ. Saranno visibili solo i parametri di input impostati come modificabili “Per oggetto“, descritti nella sezione 2.5. Potrai visualizzare i parametri di output anche in questa parte del pannello Proprietà.