Tutorial de estilos de baranda de Grasshopper
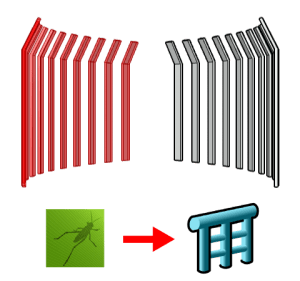
En este tutorial creará un estilo de baranda paramétrico desde una definición de Grasshopper.
Los 3 pasos principales a seguir son los mismos que en cualquier otro estilo de Grasshopper:
- Configurar la definición de Grasshopper
- Crear el estilo de baranda de VisualARQ
- Insertar y editar el estilo de baranda de Grasshopper
1. Configurar la definición de Grasshopper
Requisitos previos a tener en cuenta al crear una definición de Grasshopper para un estilo de baranda de Grasshopper:
- Las barandas en VisualARQ se crean desde una curva de trayectoria. Es necesario disponer de un parámetro Curva que actuará como propiedad vinculada con la curva de trayectoria de la baranda.
Descargue el archivo de Grasshopper que se utiliza en este tutorial aquí.
Escriba Grasshopper en la línea de comandos de Rhino para ejecutar Grasshopper.
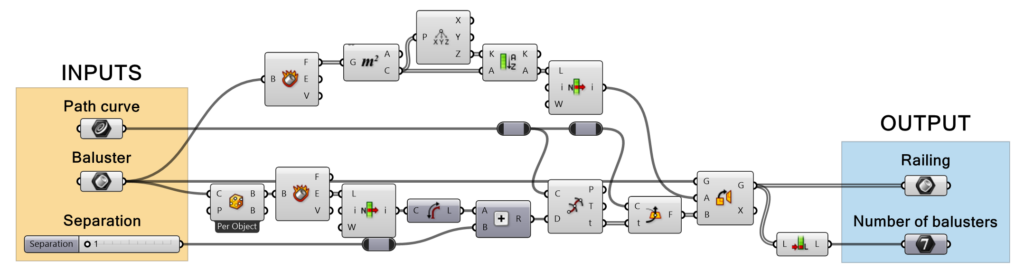
La definición de Grasshopper requiere algunos parámetros de entrada para definir las características del nuevo objeto, y parámetros de salida para definir los componentes geométricos del objeto final. Algunos parámetros de salida pueden utilizarse para recuperar información del objeto creado.
- Input parameters (Parametros de entrada): son los componentes que definirán las características del estilo de baranda resultante:
- Brep parameter (Parámetro Brep): se utiliza para la geometría de los balaustres de la baranda.
- Curve parameter (Parámetro de curva): se utiliza para la curva de trayectoria de la baranda (propiedad vinculada).
- Numeric value (floating point) (Valor numérico (punto flotante)): se utiliza para especificar la distancia entre los balaustres.
- Output parameters (Parámetros de salida): son los componentes que leerá VisualARQ una vez creado el estilo. VisualARQ solo reconoce los parámetros de salida que son componentes finales con sus nodos de salida desconectados. En este ejemplo, encontramos los siguientes parámetros de salida:
- Geometrical outputs (Salidas geométricas): son los que se leerán como partes diferentes de un estilo de objeto. En este caso, como solo hay una pieza de geometría, se utiliza un único componente Geometry (Geometría) como salida geométrica.
- Output parameters (Parámetros de salida): se utilizan para recuperar información del objeto creado. En este ejemplo, podemos encontrar un parámetro entero Integer Param que indica el número de balaustres del objeto final.
Es importante asignar nombre a estos componentes en Grasshopper para identificarlos fácilmente cuando se crea el nuevo estilo:
2. Crear el estilo de baranda de VisualARQ
El estilo de Grasshopper se creará y gestionará desde el cuadro de diálogo Propiedades de estilos de baranda.
2.1: Crear el nuevo estilo
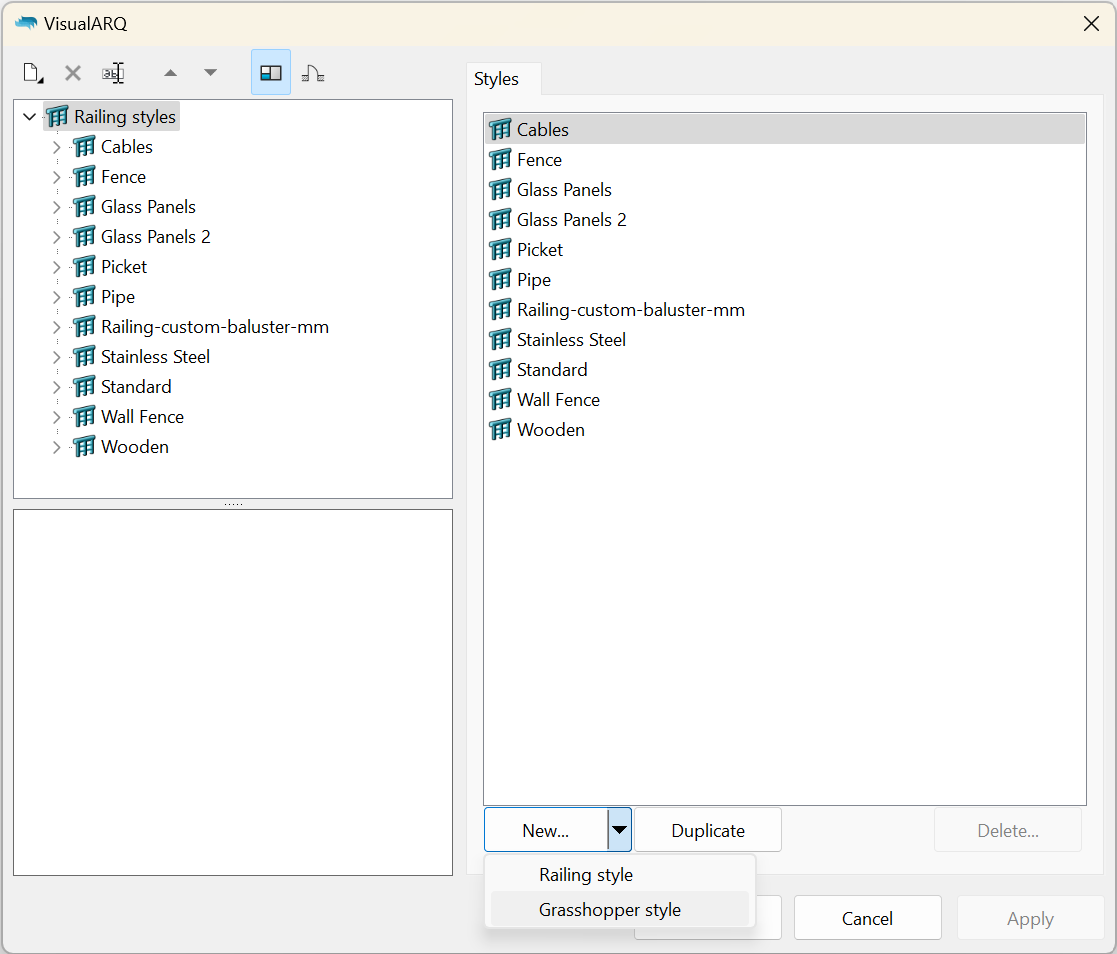
- Suponiendo que la definición de Grasshopper (archivo .gh) ya está hecha, abra el diálogo de estilos de baranda:
vaBarandaEstilos (comando). - Haga clic en el botón Nuevo… y seleccione la opción Estilo de baranda de Grasshopper.
Se abrirá el Asistente de estilos de Grasshopper . Este asistente le guiará en el proceso para definir los parámetros de estilo de baranda de Grasshopper. La parte izquierda del asistente muestra una vista previa del estilo de objeto generado una vez se ha completado la información requerida.
2.2 Abrir la definición de Grasshopper
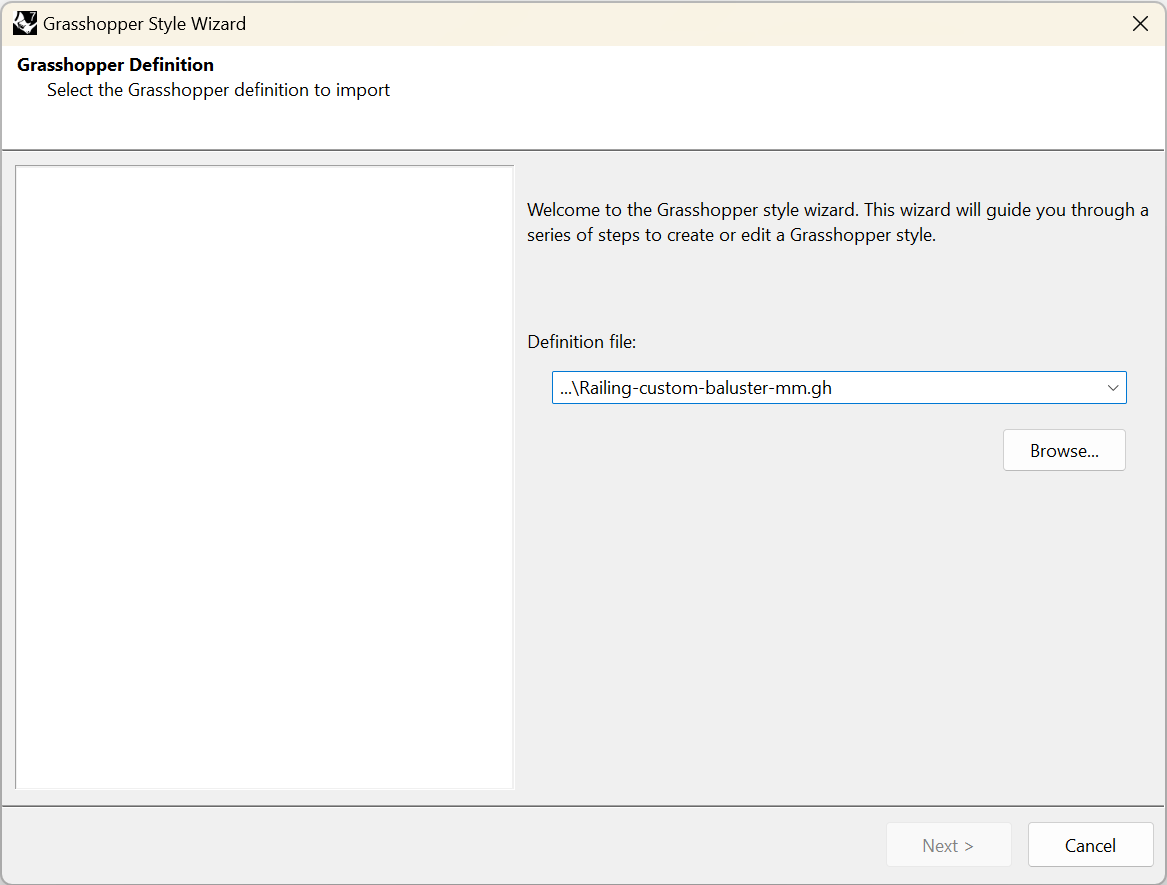
Haga clic en el botón Examinar para seleccionar el archivo .gh o elija uno de los archivos recientes de la lista desplegable.
2.3 Configuración
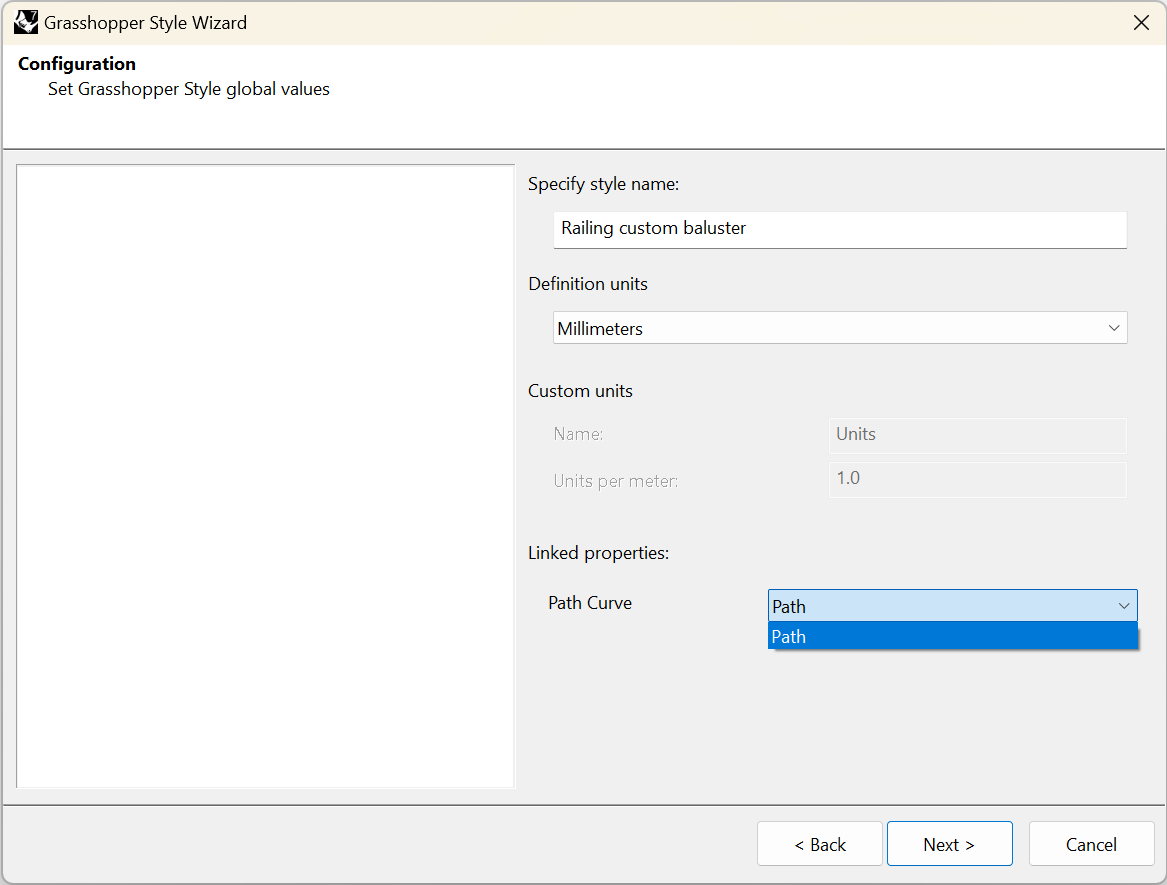
Defina los valores globales de estilo de baranda de Grasshopper:
- Nombre de estilo: defina el nombre para el estilo.
- Unidades de definición: en este caso, se ha preparado en milímetros.
- Propiedades vinculadas: seleccione un componente de parámetro de curva de entrada que represente la trayectoria. El nombre que aparece en la lista es el asignado a ese componente en el archivo de Grasshopper.
2.4 Geometría

Especifique qué componentes de geometría de salida (Params) se importarán a VisualARQ. Los identificadores de estos componentes geométricos se obtienen de los nombres de los componentes geométricos de salida de la definición de Grasshopper y solo pueden modificarse una vez creado el estilo.
Puede elegir la representación en la que se utilizará cada componente:
- Modelo: representación del objeto en 3D.
- Planta: representación del objeto en vista en planta. Solo está visible en las vistas superiores cuando está activado el plano de corte del nivel en el que está situado el objeto y se interseca con el objeto.
- Vista previa *: representación del objeto mientras se inserta (o se desplaza posteriormente). De esta forma, puede tener una vista previa del objeto final antes de finalizar el comando.
*Nota: es muy recomendable utilizar la representación de Vista previa solo para la geometría necesaria que se visualizará al insertar el objeto en el modelo. Cuantos menos componentes se comprueben en la vista previa, más rápida será la inserción o edición de estos objetos en el modelo, especialmente cuando se realizan con definiciones de Grasshopper complejas. Asegúrese de dejar al menos un componente con esta representación marcada.
En este caso, solo hay una salida de geometría que queremos mostrar en las tres representaciones diferentes: modelo, planta y vista previa. Esto significa que la representación en planta se tomará de la sección horizontal del objeto 3D según la altura del plano de corte del nivel.
2.5 Parámetros
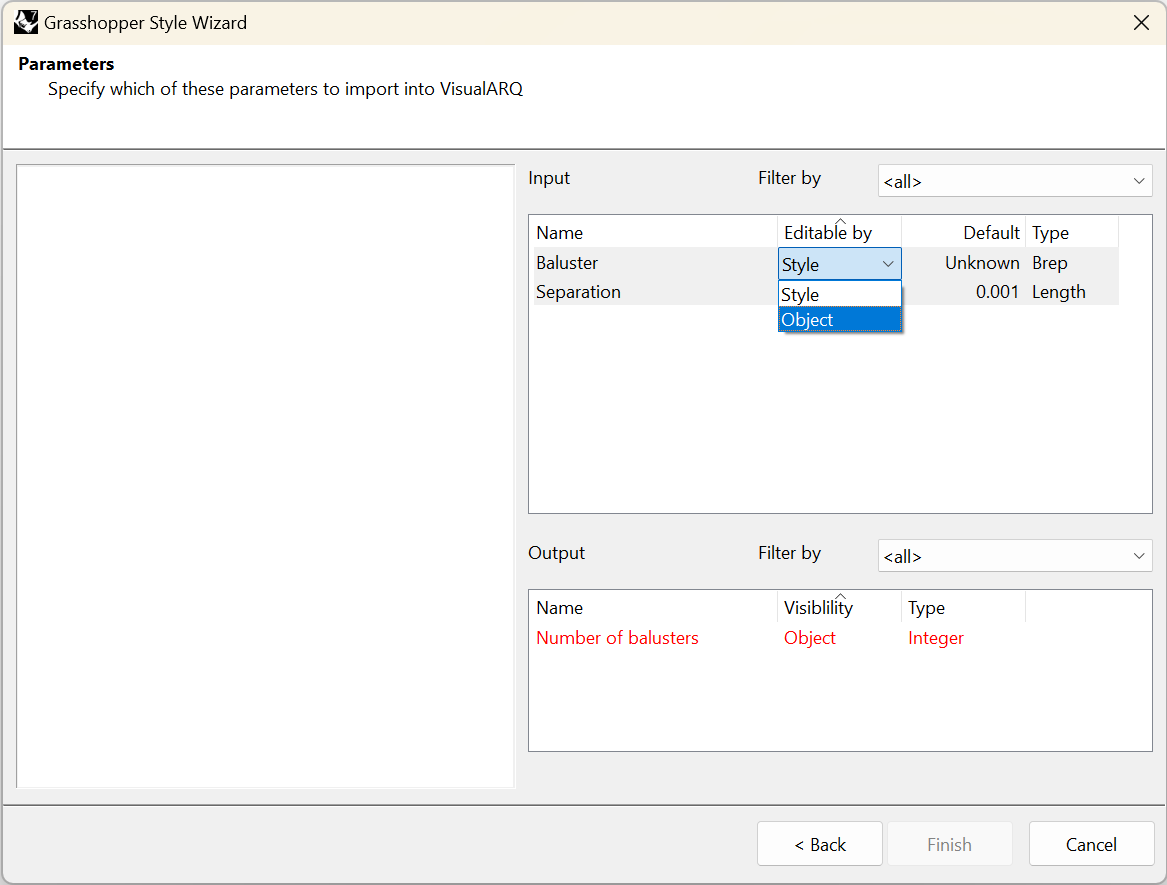
Este paso muestra las opciones disponibles en la lista de parámetros de entrada y salida definidos en Grasshopper. La opción «Filtrar por» permite ver los parámetros que se encuentran dentro de los grupos con nombre en la definición de Grasshopper (pero en este caso no es relevante, ya que en la definición de Grasshopper solo había un grupo para los parámetros de entrada y otro para los de salida). Hay dos tipos de parámetros:
- Parámetros de entrada: estos parámetros definen el estilo de la baranda.
- Parámetros de salida: estos parámetros recuperan información del objeto creado.
Las opciones son diferentes para cada uno de ellos:
- Parametros de entrada:
- Nombre: es el identificador del parámetro y puede modificarse en este paso si se desea.
- Editable por (puede cambiar este valor para varios parámetros seleccionándolos mientras mantiene pulsada la tecla Ctrl):
- Definición: el parámetro se ocultará y mantendrá el valor de la definición de Grasshopper.
- Estilo: el parámetro solo se puede editar por estilo y los cambios se aplicarán a todos los objetos del modelo que tengan ese estilo.
- Objeto: permite definir un valor diferente para ese parámetro para cada baranda del modelo que tenga el mismo estilo. En caso de que no se proporcione ningún valor «Por objeto» se utilizará el definido por estilo.
- Predeterminado (valor): muestra el valor predeterminado (los especificados en la definición de Grasshopper) de los parámetros de entrada y permite establecer diferentes valores predeterminados. En este caso, hay un parámetro Brep asignado a la geometría del balaustre. Es recomendable «internalizar datos» sobre ese componente en el archivo gh antes de guardarlo, para tener un sólido ya asignado. En caso de que no hubiera ninguna geometría internalizada, el campo de valor aparecería como «Desconocido» en rojo, indicando una geometría no referenciada y se le solicitaría elegir una Brep del modelo para continuar.
- Tipo: muestra los diferentes tipos de valores disponibles para cada tipo de parámetro. En este caso, tenemos un parámetro de geometría que se establece automáticamente en Brep y uno numérico que se ha establecido automáticamente en Longitud porque, en la definición de Grasshopper, era una entrada de valor de punto flotante.
- Parámetros de salida:
- Nombre: es el identificador del parámetro y puede modificarse en este paso si se desea.
- Visibilidad: elija la opción «Objeto» para mostrar este parámetro en los cuadros de diálogo de VisualARQ o «Ninguno» para ocultarlo.
- Tipo: muestra el tipo de valor que se ha definido previamente en Grasshopper para este parámetro.
3. Insertar y editar el estilo de baranda de Grasshopper
3.1 Editar el estilo de baranda
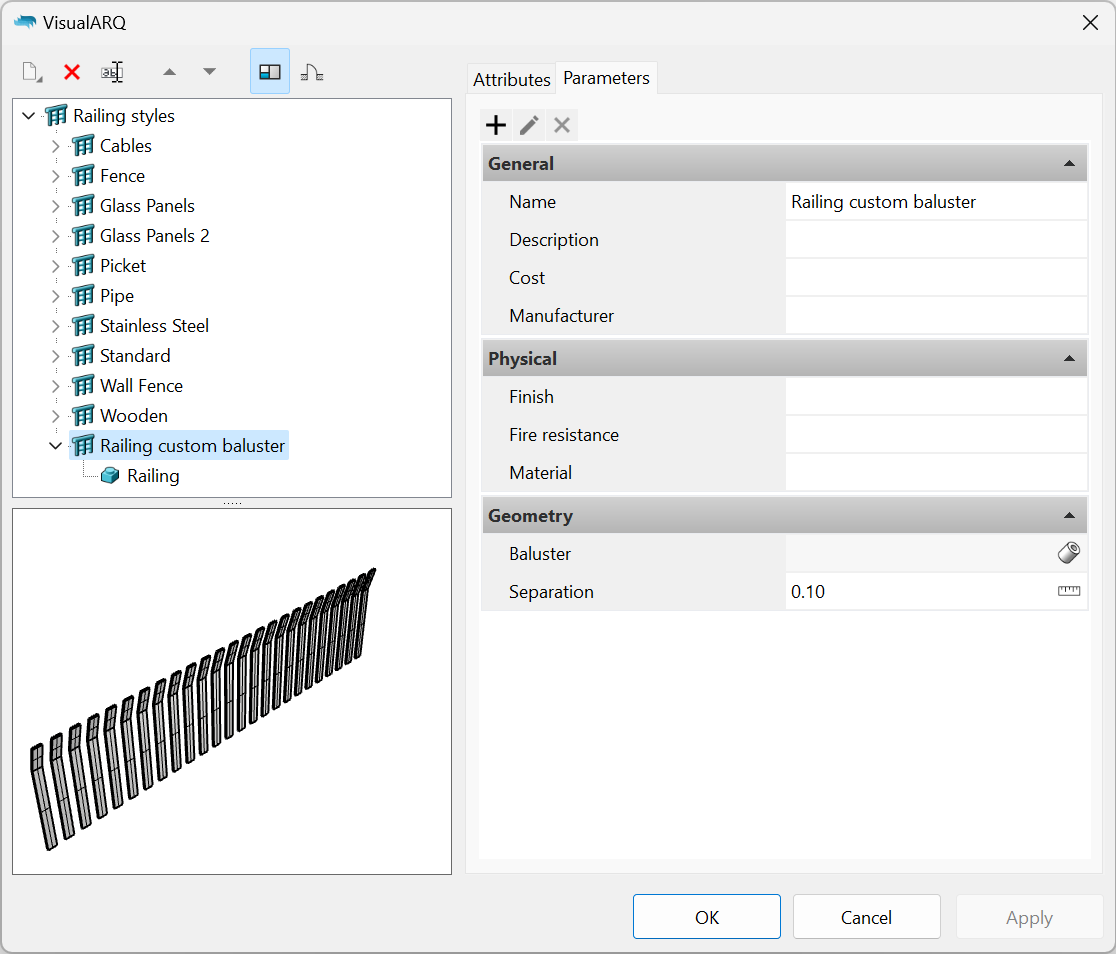
Una vez completado el asistente de estilos de Grasshopper, el nuevo estilo aparecerá en la lista de estilos de baranda. Para volver a editar el estilo, haga clic en el nombre del estilo para abrir el menú contextual y seleccione Editar. Esta operación volverá a abrir el asistente de estilos de Grasshopper.
Los parámetros de entrada estarán disponibles en la pestaña «Parámetros» y aparecerán agrupados como en la definición de Grasshopper. En caso de que el nombre del grupo coincida con una categoría existente, aparecerán en la misma categoría.
3.2 Insertar el estilo de Grasshopper
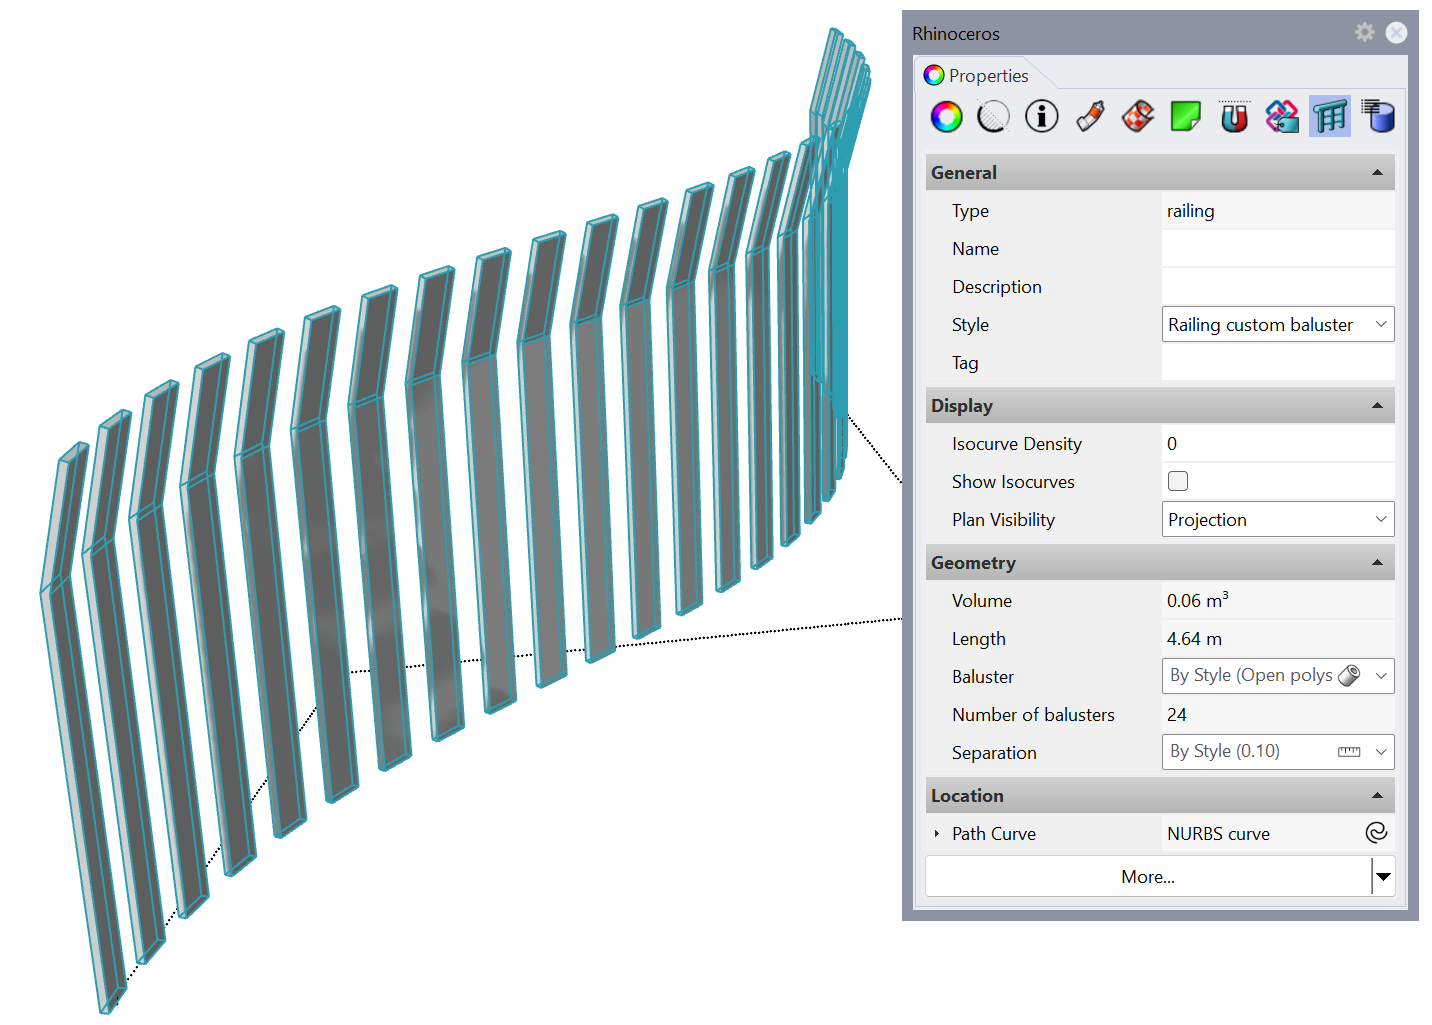
Una vez creado el estilo de baranda, podrá insertar una instancia en el documento y cambiar los valores de sus parámetros desde el icono de baranda de VisualARQ situado bajo el panel de Propiedades, tal y como funciona con cualquier otro objeto de VisualARQ. Solo se verán los parámetros de entrada que se hayan configurado como editables «Por objeto» en el paso 2.5. También se verán los parámetros de salida en esta parte del panel Propiedades.
Esta baranda también se puede insertar utilizando el comando Baranda: desde curvas.