Stair Grasshopper Styles Tutorial
In this tutorial, a parametric stair style from a Grasshopper definition will be created.
The 3 main steps to follow are the same as in any other Grasshopper style:
- Grasshopper definition setup
- Create the VisualARQ stair style
- Insert and edit a stair created from a Grasshopper style
1. Grasshopper definition setup
Prerequisites to consider when creating a Grasshopper definition for a stair Grasshopper style:
- Stairs driven from Grasshopper styles are created from an insert point. This insert point in the Grasshopper definition is measured from the document origin of coordinates (0,0,0).
Download the Grasshopper file used in this tutorial here.
Type Grasshopper in the Rhino Command line to launch Grasshopper.
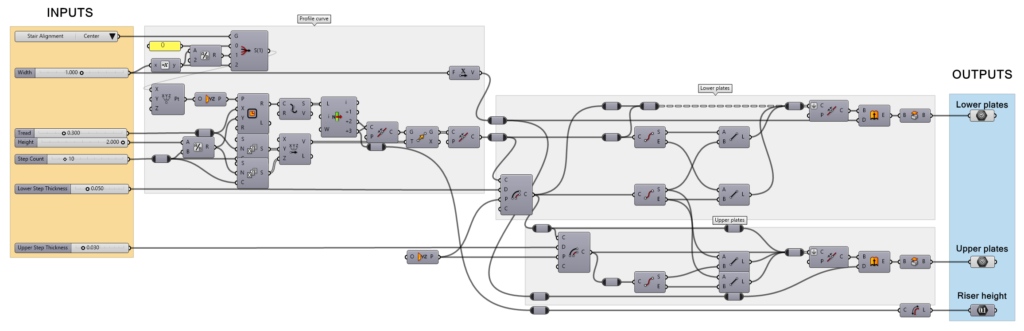
The Grasshopper definition requires some Input parameters to define the features of the new object, and Output parameters to define the geometrical components of the final object. Some output parameters can be used to retrieve information from the object created.
- Input parameters: Define the features of the resulting style. These are the different parameters we can find in this definition:
- Value list: for the three options of the stair alignment: right, center, and left. Each one corresponds to an integer value.
- Number Slider (floating point): a total of 5 sliders have been used for the various dimensions of the stair.
- Number Slider (integer): they specify the number of steps.
- Output parameters: These are the components that will be read by VisualARQ once we create the style. VisualARQ only recognizes the output parameters that are ending components with their output nodes unconnected. In this example, we find the following output parameters:
- Geometrical outputs: these are the ones that will be read as the different parts of an object style. They need to be Geometry Params which are no further connected to any other component. In this example, there are two Geometry Params: one for the upper plates and one for the lower plates.
- Output parameters: these are used to retrieve information from the object created. In this example, there is only one Number Param which will tell us the riser height of the final object.
It is important to name these components in Grasshopper to identify them easily when creating the new style:
2. Create the VisualARQ stair style
The Grasshopper style will be created and managed from the Stair Styles dialog.
2.1 Create the new style
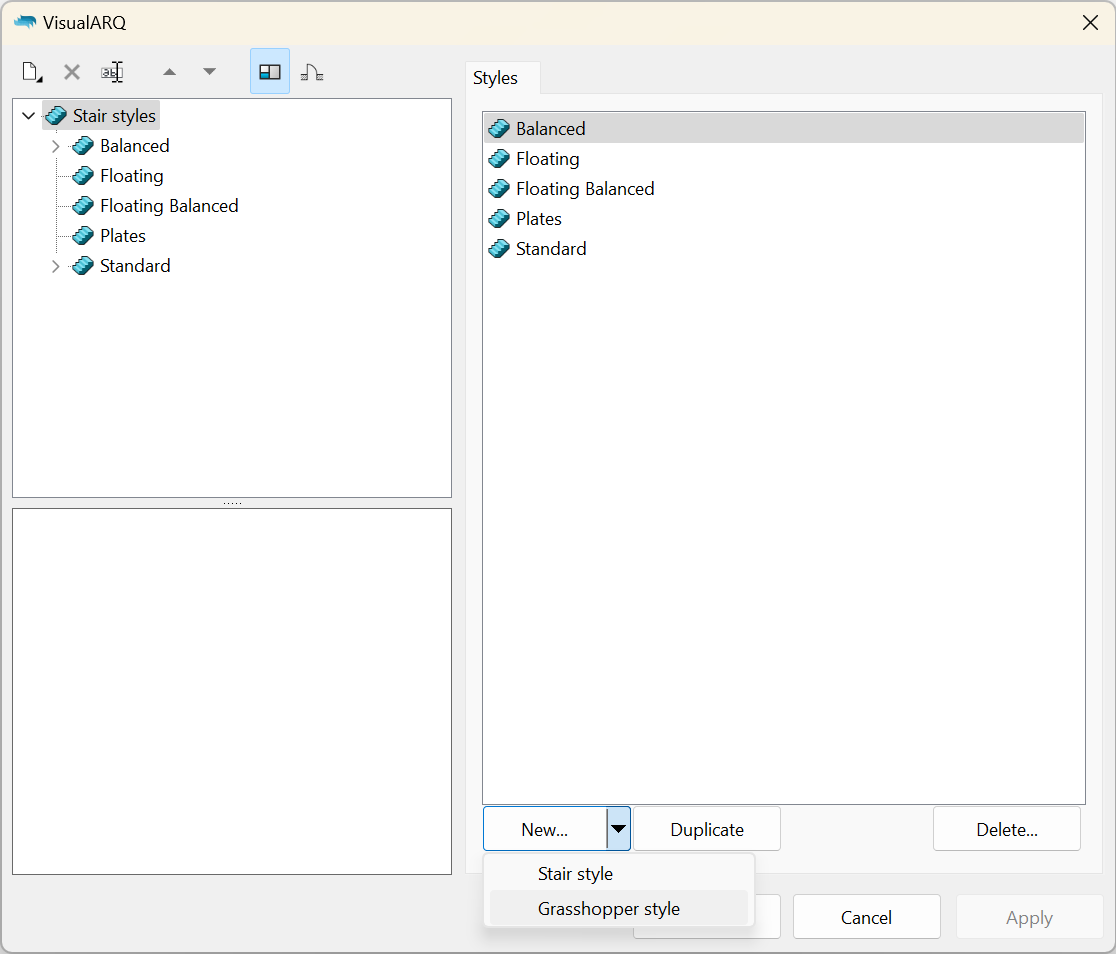
- Assuming the Grasshopper definition (.gh file) is already done, open the stair styles dialog:
_vaStairStylescommand. - Click on the New… button and select the Grasshopper stair style option.
The Grasshopper Style wizard will appear. This wizard will guide you through the steps to define the stair Grasshopper style parameters. The left side of the wizard will show a preview of the object style generated as soon as the required information is completed.
2.2 Open the Grasshopper definition
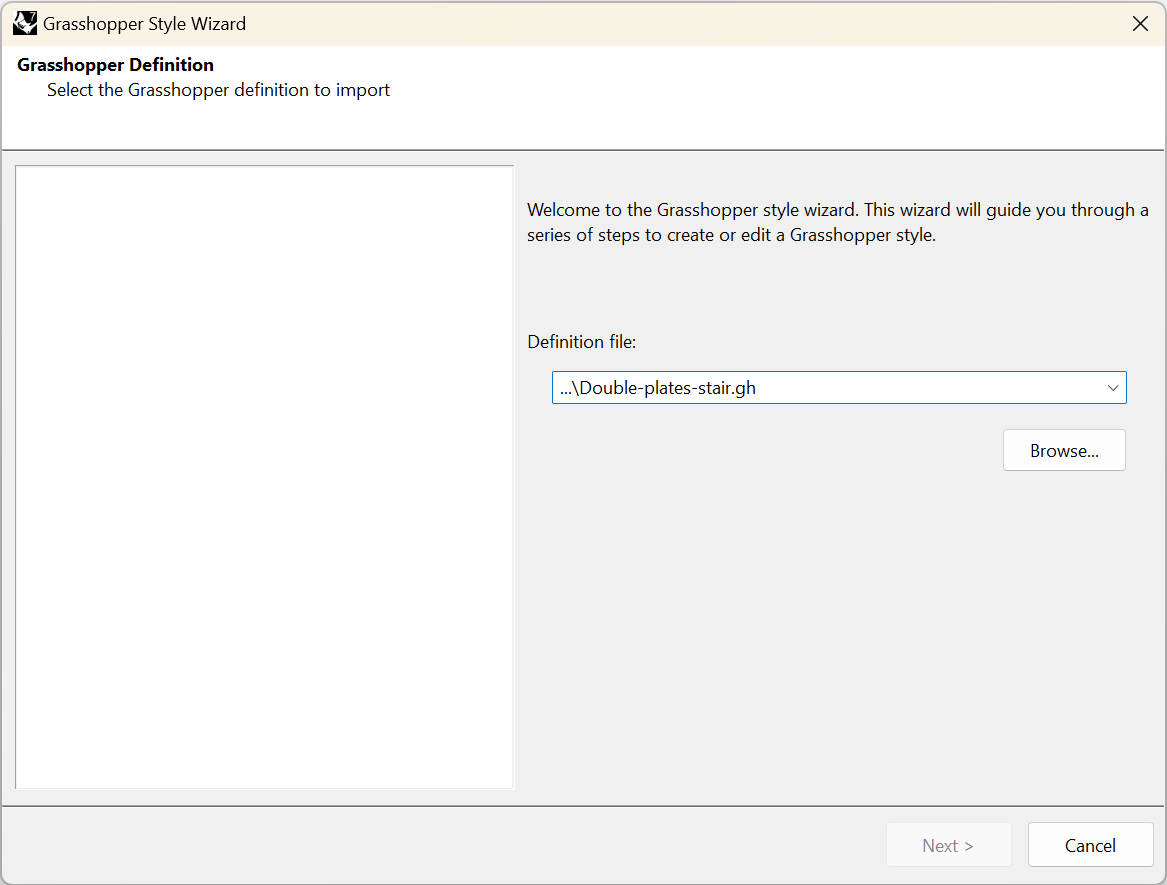
Click on the Browse button to select the .gh file or choose one of the recent files from the drop-down list.
2.3 Configuration
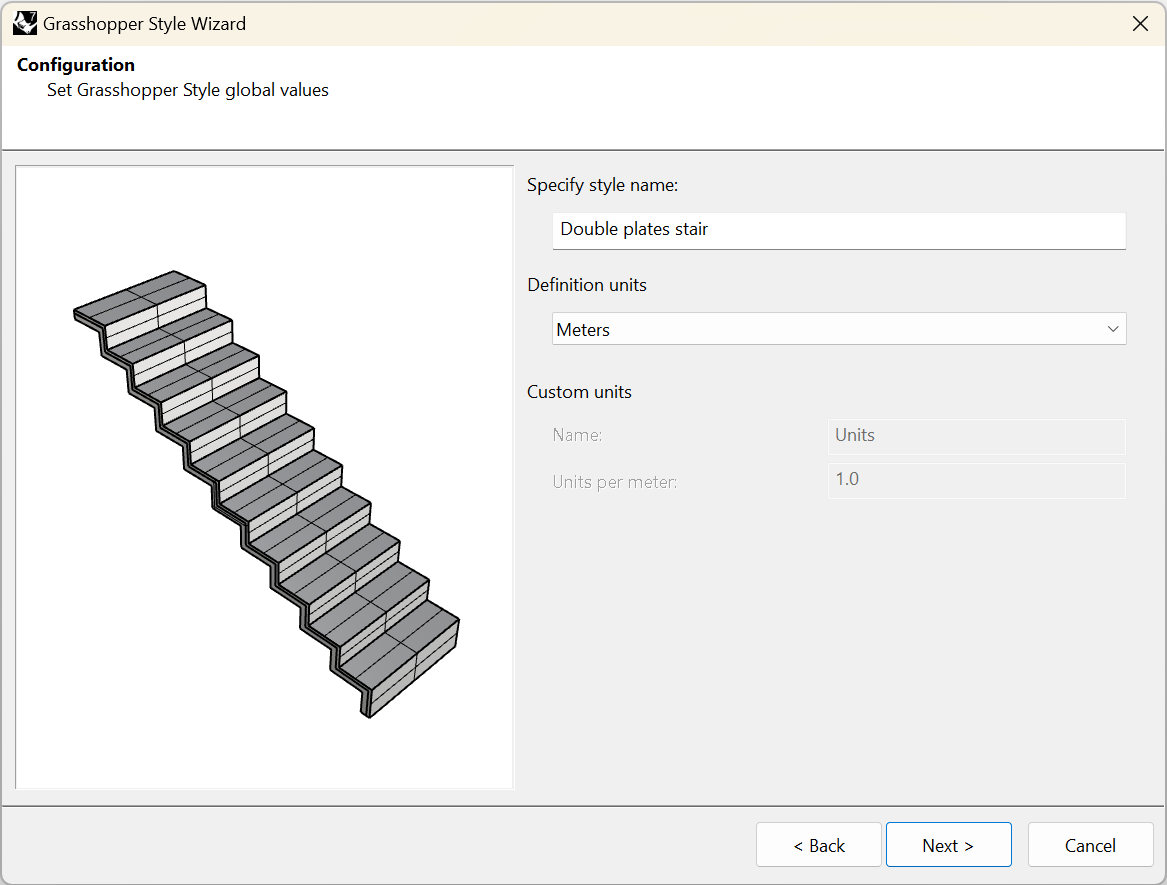
Set the stair Grasshopper style global values:
- Style name: set the desired name.
- Definition units: in this case, it has been prepared in millimeters.
2.4 Geometry
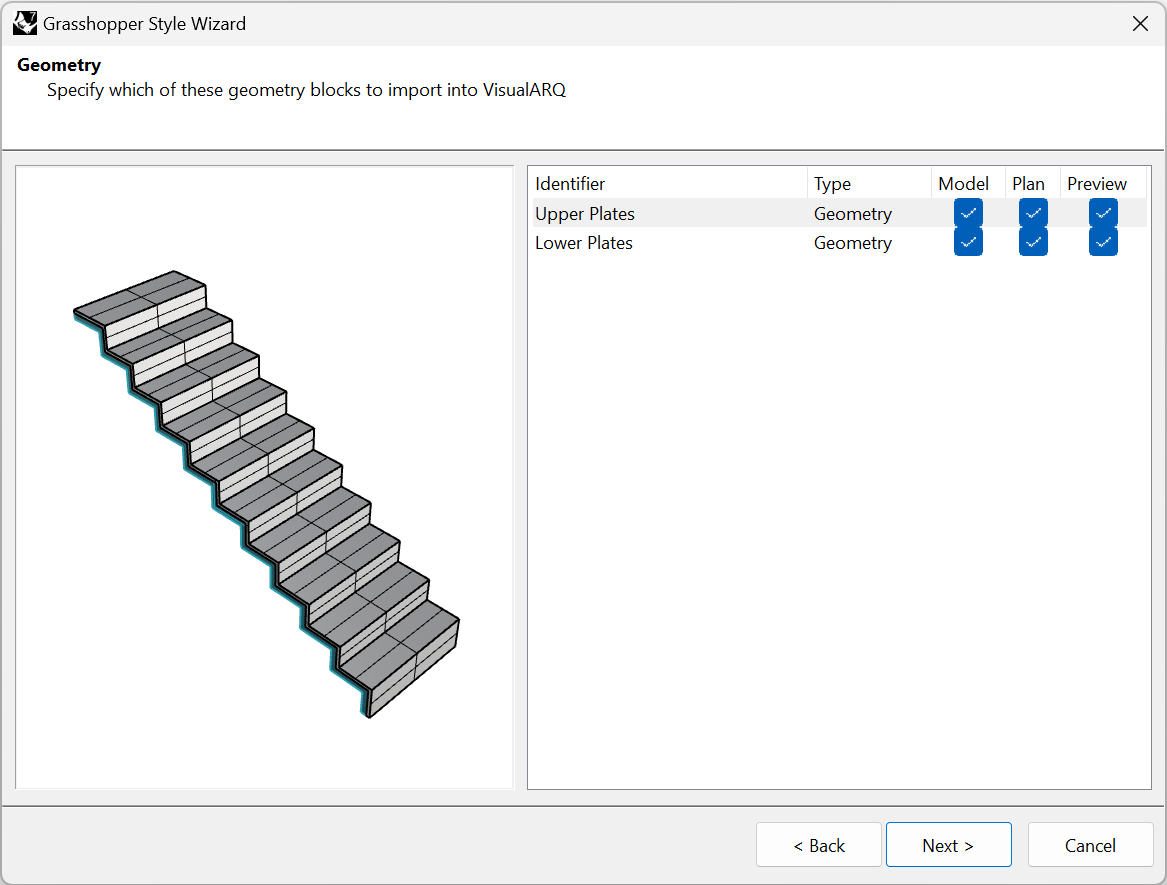
Specify which of the output geometry components (Params) to import into VisualARQ. The identifiers of these geometry components are taken from the names of the geometrical output components in the Grasshopper definition and can be modified only once the style has been created.
You can choose the representation where each component is going to be used:
- Model: the object representation in 3D.
- Plan: the object representation in plan view. Only visible in top views when the Cut Plane of the level where the object is placed is enabled and intersects the object.
- Preview *: the object representation while the object is being inserted (or moved afterward). This way, you can have a preview of the final object before ending the command.
*Note: It is highly recommended to use the Preview representation only for the necessary geometry to be displayed while inserting the object in the model. The fewer components checked for the preview, the faster will be the insertion or edition of these objects in the model, especially when they are made with complex Grasshopper definitions. Beware to leave at least one component with this representation checked.
In this case, there is only one geometry output that we want to show in the three different representations: model, plan, and preview. That means that the Plan representation will be taken from the horizontal section of the 3D object according to the level’s cut plane height.
2.5 Parameters
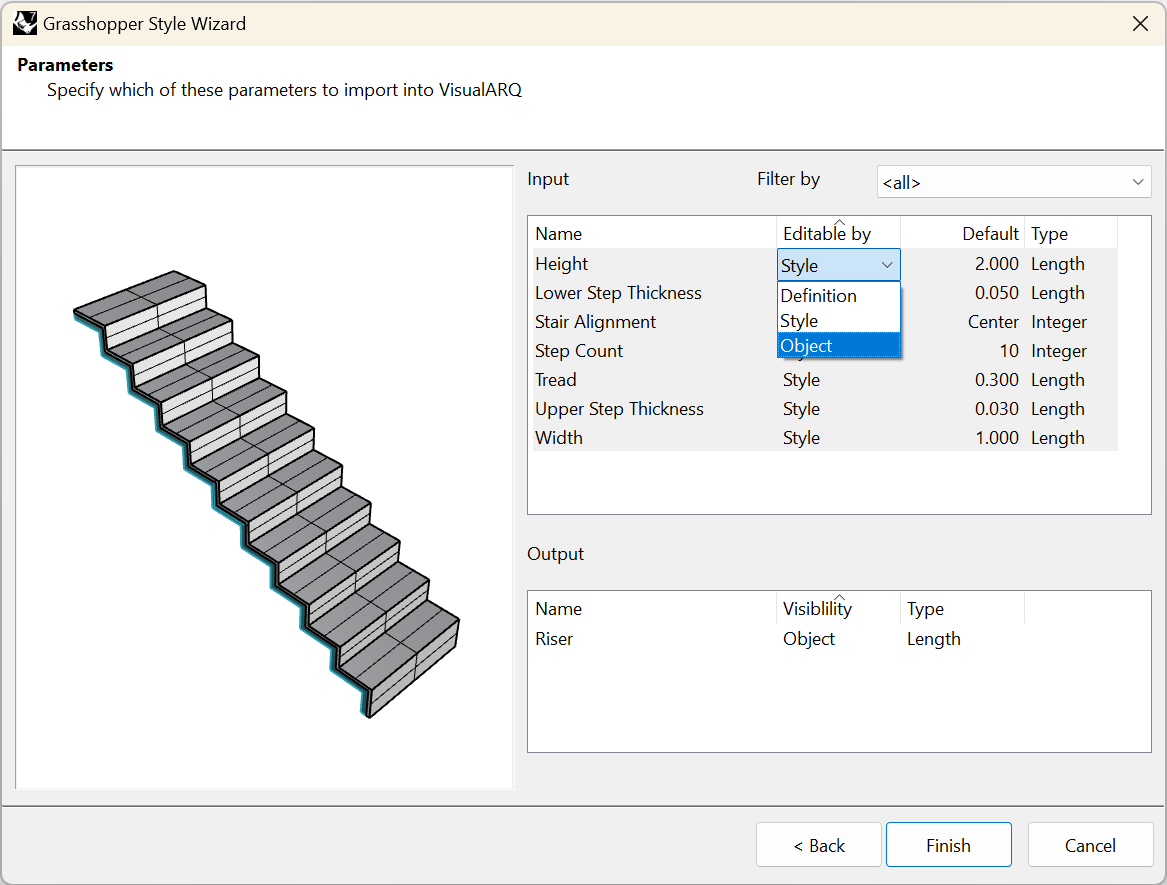
This step shows the settings available for the list of input and output parameters defined in Grasshopper. The filter by option lets you view the parameters located inside named groups in the Grasshopper definition. There are two kinds of parameters:
- Input parameters: these parameters define the stair style.
- Output parameters: these parameters retrieve information from the object created.
The settings are different for each of them:
- Input parameters:
- Name: it is the identifier of the parameter and can be modified if desired in this step.
- Editable by (you can change this value for several parameters by selecting them while holding the Ctrl key.):
- Definition: the parameter will be hidden and it will keep the value from the Grasshopper definition.
- Style: the parameter can be edited only by style and the changes will apply to all objects in the model with that style.
- Object: allows to set a different value for that parameter for each stair in the model that has the same style. In case no value is provided “By object” the one defined by style will be used.
- Default (value): shows the default value (the ones specified in the Grasshopper definition) for the input parameters and lets you set different default values.
- Type: shows the different types of values available for each kind of parameter. In this case, most of them are floating point values that have automatically been set to Length. There are also two integer values for the step alignment and the step count.
- Output parameters:
- Name: it is the identifier of the parameter and can be modified if desired in this step.
- Visibility: choose the option “Object” to display this parameter in the VisualARQ dialogs, or “None” to hide it.
- Type: shows the type of value which has previously been defined in Grasshopper for this parameter.
3. Insert and edit the stair Grasshopper Style
3.1 Edit the stair style
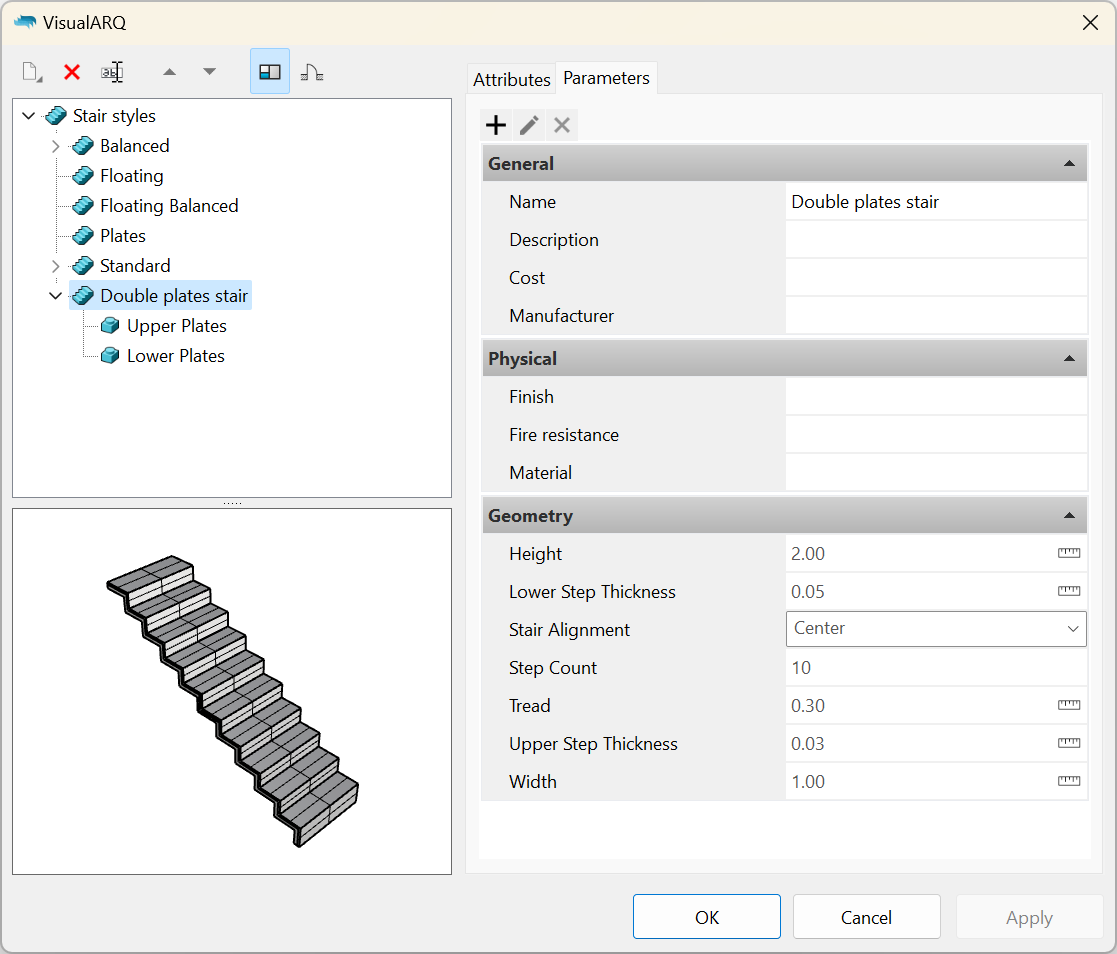
Once the Grasshopper style wizard is completed, the new style will appear in the stair styles list. To edit the style again, right-click on the style name to open the context menu and select Edit. This operation will open the Grasshopper-style wizard again.
The input parameters will be available under the “Parameters” tab and will appear grouped as in the Grasshopper definition. In case the name of the group matches an existing category they will appear in the same category.
3.2 Insert the Grasshopper style
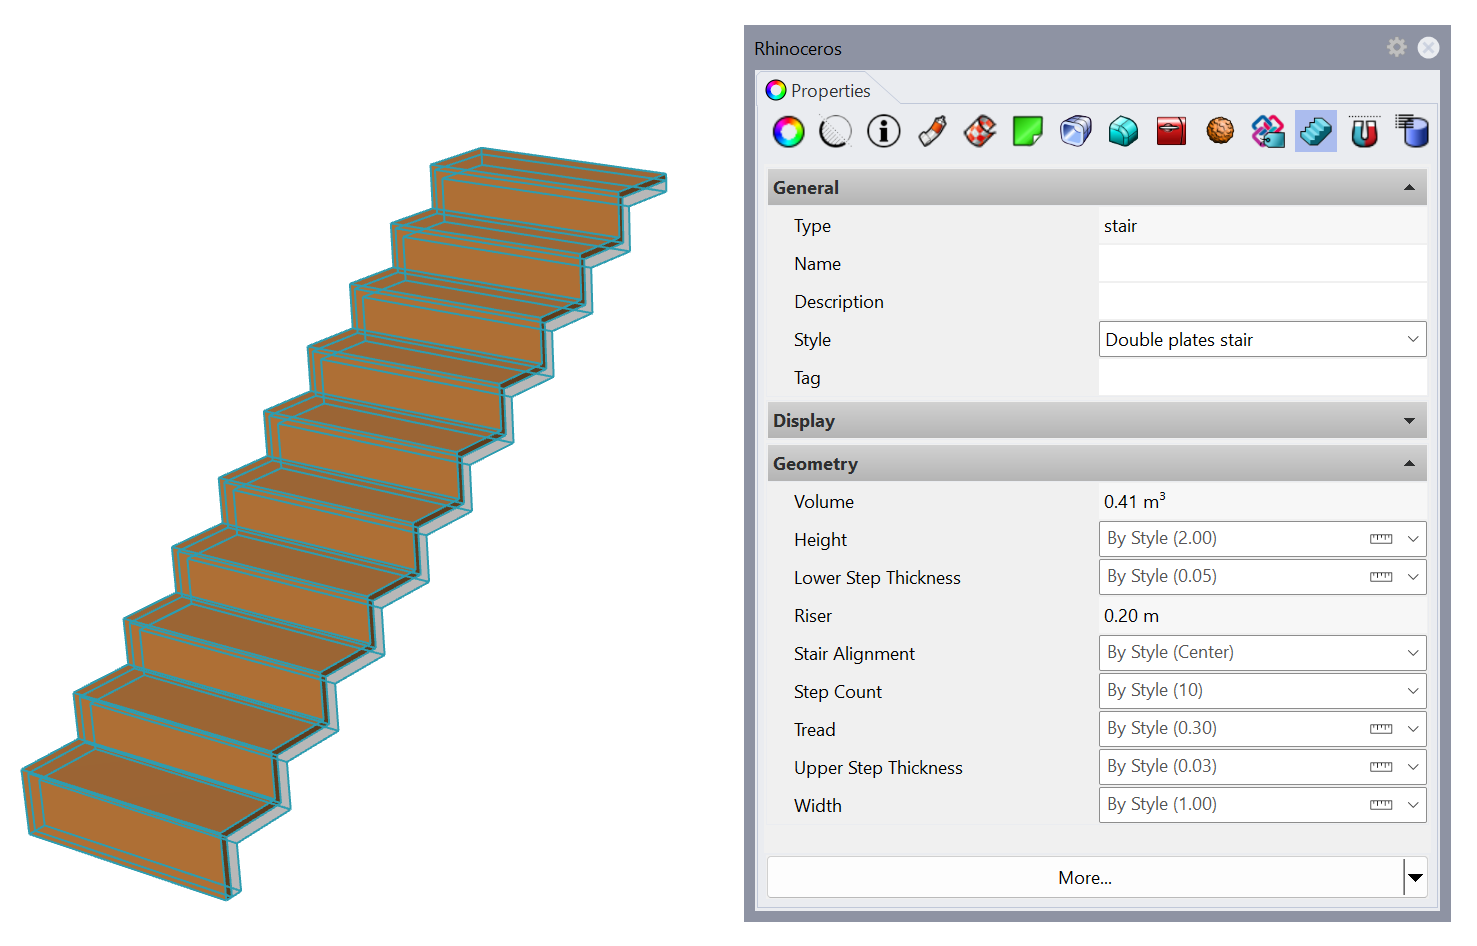
Once the stair style has been created, you will be able to insert an instance in the document and change the values of its parameters from the VisualARQ stair icon located under the Properties panel, as it works with any other VisualARQ object. Only those input parameters that were set as editable “By Object” in step 2.5 will be visible. You will see the output parameters in this part of the Properties panel as well.