Uploading a VisualARQ style
We will assume there are already some styles created in your document. (Read below the different style types).
1. Generate the .val file.
- Run the _vaStylesExport command.
- Select the option New file and click on the Browse button to save the .val file in your PC. Click Next button.
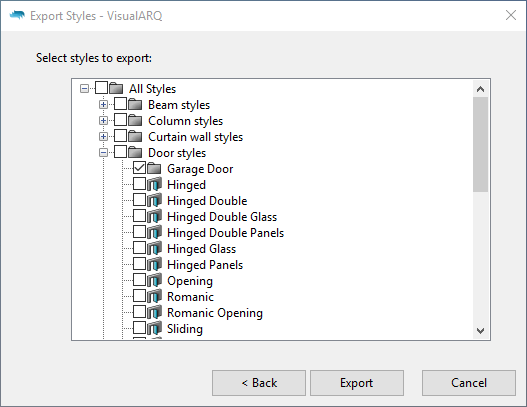
- Select the styles to export from the list. A .val file may contain 1 or multiple styles from different objects.
2. Upload the .val file in food4Rhino
- Login in food4Rhino: https://www.food4rhino.com/
- Click on your User name.
- From the “My content” tab, select Add Resource.
- Fill the form to add a new resource.
- Type: choose “VisualARQ style”
- Title: name that will be displayed within the thumbnail.
- Short description: a few words to explain what the .val file includes.
- Body: long description of the object style. We recommend the following description structure, as you can see in this example.
- Object type
- List of Components
- List of editable parameters
- Thumbnail image: make it clear.
- Other images: add more images showing the different variations of the same object style.

Downloading and importing the .val in your document.
1. Download the .val file from food4Rhino.
- Login in food4Rhino.
- Go to the VisualARQ styles section in food4rhino, select the desired VisualARQ style, and click on the Download link.
2. Import the .val file in your document
- Run the _vaStylesImport command.
- Browse to select the .val you have downloaded. Click Next.
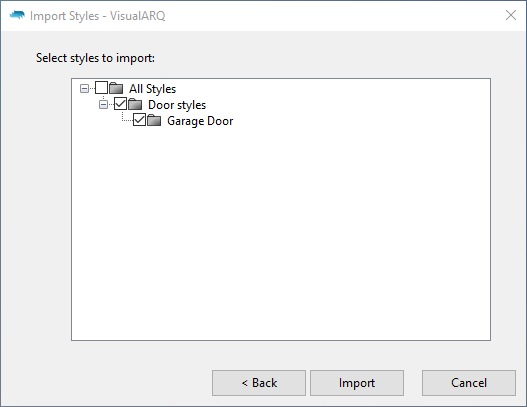
- Select the styles to import from the list and click Import button.
About VisualARQ styles
A VisualARQ style defines the features of a VisualARQ object. New styles can be created in three different ways, depending on the object type:
- By native parameters: the different components and editable parameters are already defined and vary to each object type. This option is available for these objects: wall, curtain wall, beam, column, door, window, opening, railing, slab, roof, space, table, tag, section, opening elevation, section view and plan view. (Example)
- By block: a 3D block and/or a 2D block are used for the object 3D and plan view representation respectively. This option is available for these objects: column, door, window, opening, furniture, element and annotation. (Example)
- By Grasshopper definition: objects created from a Grasshopper definition, also called “Grasshopper styles”. The number of components and parameters are unlimited and are defined in the Grasshopper file. This option is available for these objects: column, door, window, opening, beam, railing, stair, slab, roof, furniture, element and annotation. (Examples)