- You need to save the model to the STL file format, which is the most common file format for 3D printers.
- The STL format requires a valid closed polysurface. So, for each separate piece out of the 3D model you want to print, you need to generate a single closed polysurface.
- Save a copy of the project since, once you have exploded VisualARQ objects, you won’t be able to recover their parametric properties.
- Simplify VisualARQ object styles. That means that, if you have multilayer walls and slabs, you need to edit their styles and turn them into single-layer wall and slab styles.
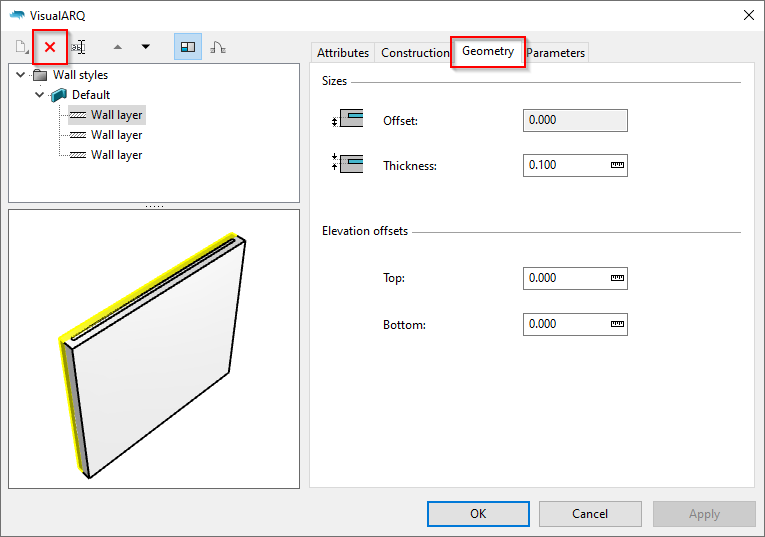
For each wall style, delete all layers but one and change the wall style thickness so that it keeps the same total thickness as before.
- Check out the minimum thickness the printer can handle when you scale the model. You may need to change the size of some VisualARQ object components that have small sizes, such as door or window stops, frames, muntins, railing posts, etc. or just delete them straightaway. It is easier and faster to do these changes from the object styles dialogs than later, when you have exploded the objects.
- After exploding VisualARQ windows (and doors) that have glasses, the glass components become open surfaces that can’t be printed. You need to give them a thickness with the Extrude or OffsetSrf command. Or just delete them. In VisualARQ templates, glass components are generated in a specific layer, so it is easier to select and delete them at once.
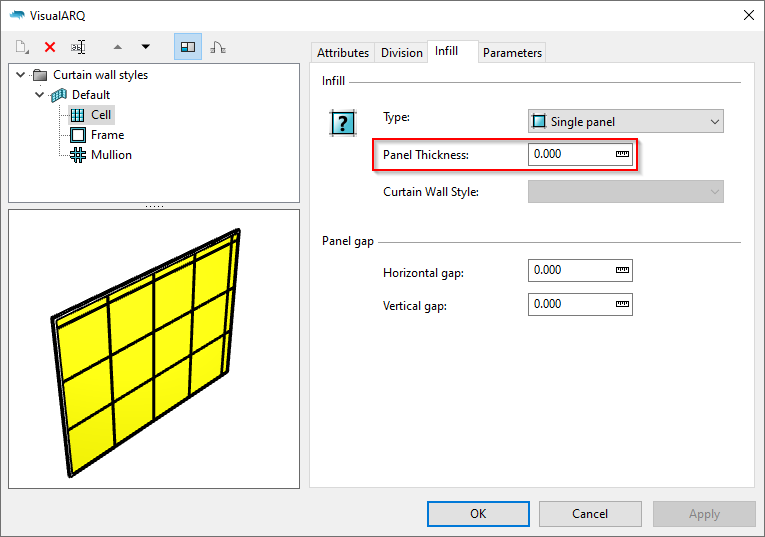
- Provide a proper thickness to curtain wall panels if you want to print them. You can do that from the Curtain wall styles dialog, selecting the Cell component, under the Infill tab.
- Some VisualARQ objects are linked (walls with walls, openings with walls, columns with walls) and create intersections. It is convenient to select and explode all these objects at the same time, in order to keep the intersections in the resulting polysurfaces.
- Be careful with the non-manifold edges some VisualARQ objects may generate after being exploded and subsequently joined back together through boolean unions to generate valid closed polysurfaces. Door or window styles with “swing” aperture types are a clear example of this. For example, after exploding a “Hinged Simple” door style, the door leaf and frame are touching each other by one of their edges. This edge in common becomes a non-manifold edge when you do a boolean union between the two objects. In order to prevent that, you need to move the door leaf inside the door frame.
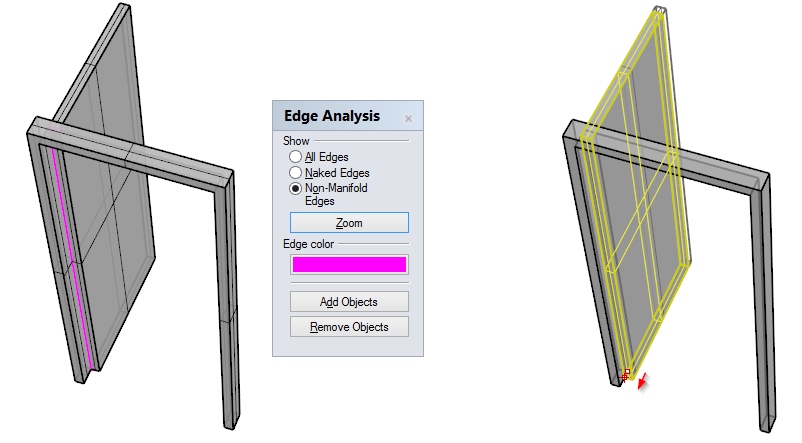
After having exploded the door object and before making a boolean union between the door leaf and frame, it is convenient to move the door leaf (right picture). Otherwise, you may get a non-manifold edge (left picture)
- Run the BooleanUnion command to join the different parts of the model together. We suggest you to do this gradually rather that all at once with the whole model. The command will perform better.
- Use the Edge Analysis tool (Analyze > Edge Tools > Show Edges) to check if there are naked or non-manifold edges in the resulting geometry. If this is the case, you may need to repair that geometry by exploding it and making boolean unions again.