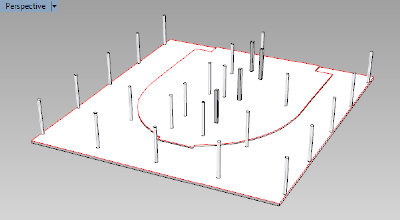
Ground floor columns
Insert a new column:

- Show the Ground floor bitmap layer to visualize where to place the columns.
- Run the _vaColumn command
 . The column Insert dialog box will appear with the list of column styles available and the insertion options.
 - Select the column style you wish to use (round style), the alignment, the insertion mark (if wished) and the column profile size; select “other” to set a different size from the sizes available by default (0,125 m of radius in this case).
- Select the column insertion point with a left-click on the desired point in the model, and the column orientation manually with the cursor.
- Now you can create the rest of the ground floor columns by inserting them individually or copying the first one all around. Take into account the elevation and height of each column, according to where they are situated (columns inside the building are 2,75m high, and columns in the porch are 2,85m).
Change column properties
The parameters of the Column object (like other VisualARQ objects) can be edited in two different ways: VisualARQ properties in Rhino properties dialog box.
 VisualARQ Object properties dialog box.
Back to Index menu
