Ground floor windows
1. Insert a new window:
- Run the _vaWindow command
 or click on the window icon in the Object toolbar. The window insert dialog box will appear, with the list of existing window styles.
 - Select the window style you wish to insert and the basic insert options (alignment, plan and model aperture (%), Profile dimensions.. (choose “Other” to use a different size than the one by default)).
- Insert the window in the model:
- Specify the insertion point.
- Specify the window opening side by left-clicking on the desired side of the wall.
Change the window parameters:
The parameters of the window object can be edited in two different ways:-
 VisualARQ Properties in Rhino Properties dialog box.
  VisualARQ Object Properties dialog box.
2. Create and edit the window styles
- Open the Window Styles dialog box: run the _vaWindowStyles command or do right click on the window icon on the VisualARQ Objects toolbar.
- Edit the Window Style: Each window style has different tabs for editing the parameters that define the style:
- Opening type
- Geometry: the window profile shape
- Sizes (pre-defined dimensions)
- Blocks: option to assign a custom 3D block for the 3D model and a 2D block for the Plan view representation.
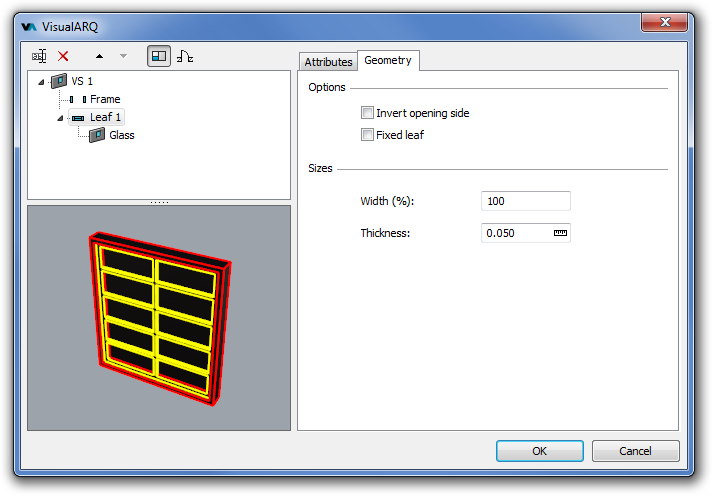
- Edit the window components: Select a window style and expand it using the triangle arrow to see its components. Windows can have the following components: Frame, Leaf, Glass, Stop, and Sill. To edit a window component select it and edit its values in each tab . The Attributes tab allows editing each component individually for the display and printing options.

Create a new window style
- Open the Window Styles dialog: Use the _vaWindowStyles command to create the new style “VS 1”.
- Click on the New.. button, select the Window style to open the window style wizard
- Follow the steps of the window style wizard:
- Style name
- Opening type
- Structural opening profile
- Define a standard size
- Frame component and its sizes
- Stop component and its sizes
- Window leaves
- Sill component
Create and insert the rest of the window styles

- Create the new window styles VS2 and VS3 from the window styles dialog. You can duplicate the VS1 style to create the VS2 and VS3 and then modify their parameters. Select the copies, rename them and assign them the different parameters.
- Insert
 the new windows in the model.
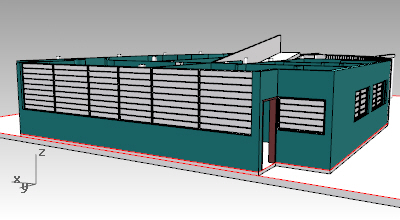
 - Opening array: For the windows of the north façade you can use the opening array command:
- Insert the window
 at the edge of the north façade.
 - Run the _vaOpeningArray command
 available in the VisualARQ Tools toolbar.
 - Select the wall where you wish to perform the array of openings.
- Select the window inserted in that wall.
- Type the number of copies in the path direction (x6) and the elevation direction (x1).
- Enter the base point and the path distance between each window copy along the path direction. Since there is only 1 copy in the elevation direction, the command ends here.
- Insert the window
- Adjust the windows position: Since the 2 central windows have different width, you need to change their dimension in the VisualARQ Object Properties dialog, in the Rhino Properties dialog box
 . Use an auxiliary curve to find the middle point between the 2 central windows and the Rule icon
  to pick the central window Width dimension.
Back to Index menu
