Grasshopper Styles tutorial
The Grasshopper Styles are those VisualARQ object styles created from Grasshopper definitions.
You need to have Grasshopper installed.
The process of generating and using a Grasshopper style can be defined in 3 steps:
- Grasshopper definition setup
- Create the VisualARQ object style
- Insert and edit a VisualARQ object created from a Grasshopper style
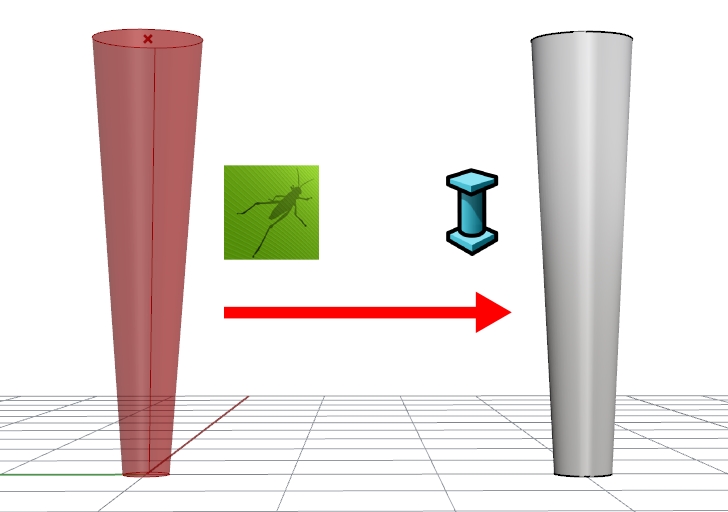
In the example below we will create a parametric “Column style” from a Grasshopper definition.
1. Grasshopper definition setup
Type Grasshopper in the Rhino Command line to launch Grasshopper.
In order to use a Grasshopper definition for creating a VisualARQ object, you need:
1. Input parameters:
The input parameters are the values that will define the features of the resulting object. VisualARQ only recognizes the input parameters that are starting components with their input nodes unconnected. They can be:
- Numeric values
- Value lists
- Boolean toggles
- Texts
- Geometric data
2. Output Parameters
The output parameters define the final geometrical parts of the new style, but also the calculated parameters that can be displayed in the properties dialog or listed in tables. VisualARQ only recognizes the output parameters that are ending components with their output nodes unconnected:
- Geometrical output components: they are the geometrical components that become the visible parts of the object in the model:
 Geometry Param(Params > Geometry > Geometry): Component for geometric elements.
 Text Param (Params > Geometry > Text): Component for Text elements.
 Hatch Param (Params > Geometry > Hatch): Component for Hatch elements.
- Read-only output components: they are calculated parameters that are displayed as Read-only information in the VisualARQ properties panel. These are the supported components:
- Integer
- Number
- Boolean
- Text
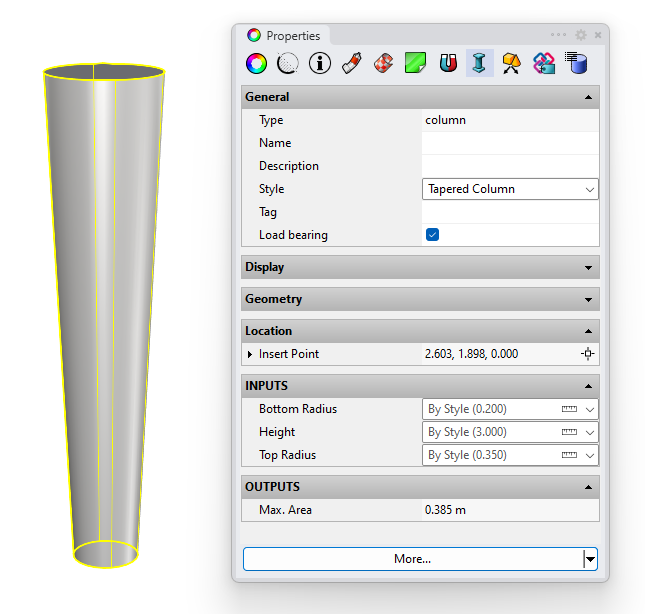
In the example below we will create a parametric “Column style” from the following Grasshopper definition. It’s a simple column with a circular profile that will be defined with the following input parameters:
- Height
- Top Radius
- Bottom Radius
As output parameters, we can find a Geometry Param, for the column geometry, and a Number component that stores the maximum area of the column.

2. Create the VisualARQ object style
The Grasshopper styles are created and managed from the Style Properties dialog for each one of the following objects: Wall, Curtain Wall, Beam, Column, Window, Door, Opening, Stair, Railing, Slab, Roof, Furniture, Element and Annotation.
2.1: Create the new style
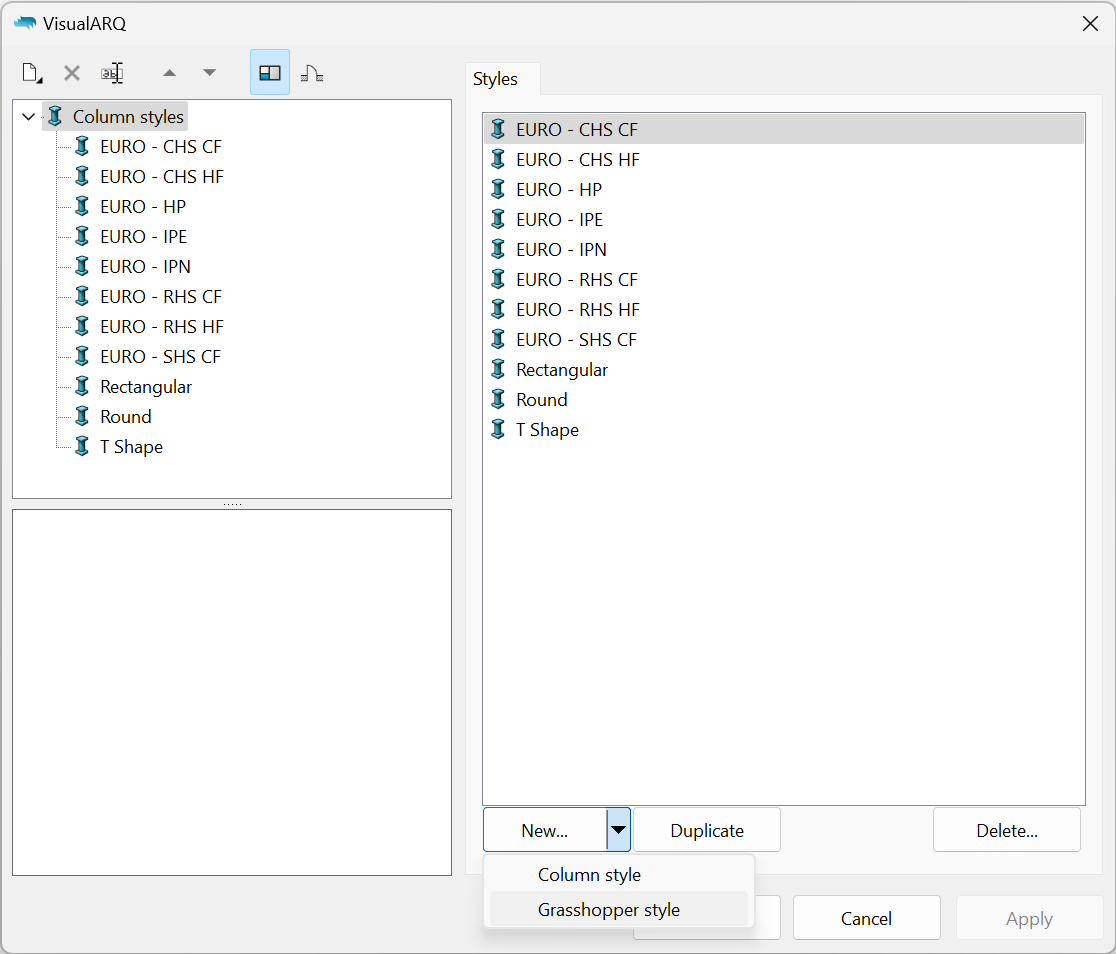
Assuming the Grasshopper definition (.gh file) is already done, open the object styles dialog of the desired object type: vaColumnStyles.
Click on the New… button and select the Grasshopper style option.
The Grasshopper Style wizard will appear. This wizard will guide you through the steps to define the Grasshopper style parameters. The left side of the wizard shows a preview of the object style generated as soon as the required information is completed.
2.2: Open the Grasshopper definition
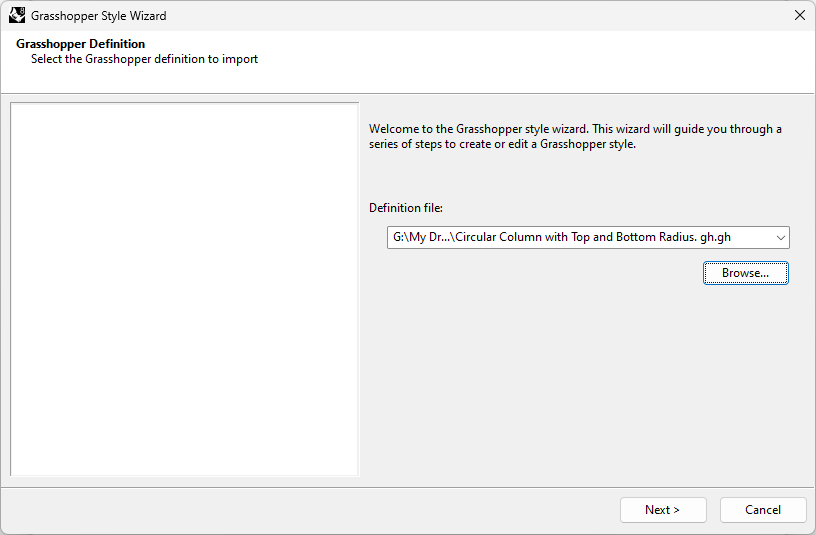
Click on the Browse button to select the .gh file created before.
2.3: Configuration
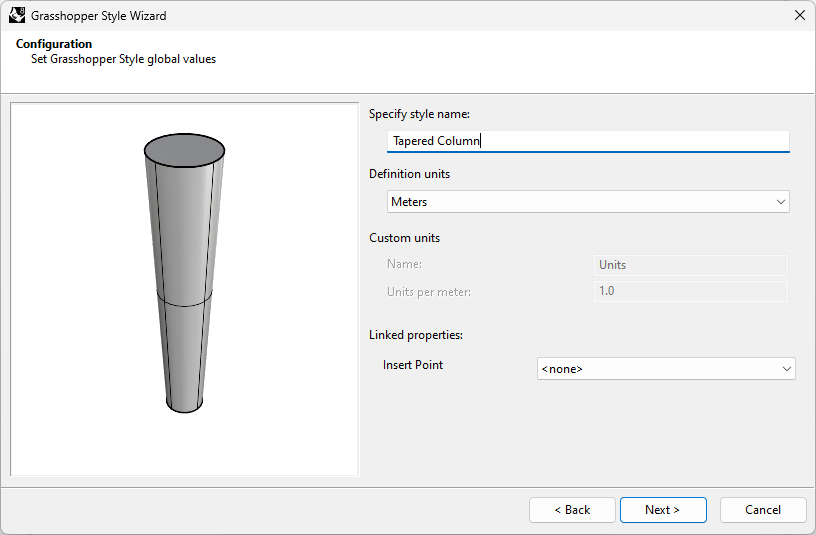
Set the Grasshopper style global values:
- Style name: By default, the name is taken by the Grasshopper file name, but you can change it here.
- Definition units: Meters, in this case.
- Linked properties: Depending on the object type, you need to specify which input parameters will act as linked properties with the object to create. In this case, we leave the Insert point as None, so the insert point of the object is referenced from the Origin coordinates (0,0,0) in the Grasshopper definition
These are the different linked properties we can find for the different object types when we create a Grasshopper style:
- Insert point: for the Column, Furniture, Element, and Annotation objects. If the None option is selected, the insert point of the object is referenced from the Origin coordinates (0,0,0) in the Grasshopper definition.
- Insert plane: for the Furniture, Element, and Annotation objects. If the None option is selected, the insert plane of the object is referenced from the XY plane on the Origin coordinates (0,0,0) in the Grasshopper definition.
- Path curve: for the Wall, Curtain wall, Beam, and Railing objects.
- Boundary: for the slab, and the roof objects. It can be a closed planar curve or a surface.
- Profile: for the Window, and Door objects. When the Auto option is selected, the bounding box of the dynamic block will perform as the cutting volume when this object is inserted into a wall.
- Height: for walls and curtain walls. That linked property will enable joints and extensions of walls and curtain walls created as Grasshopper styles.
2.4: Geometry
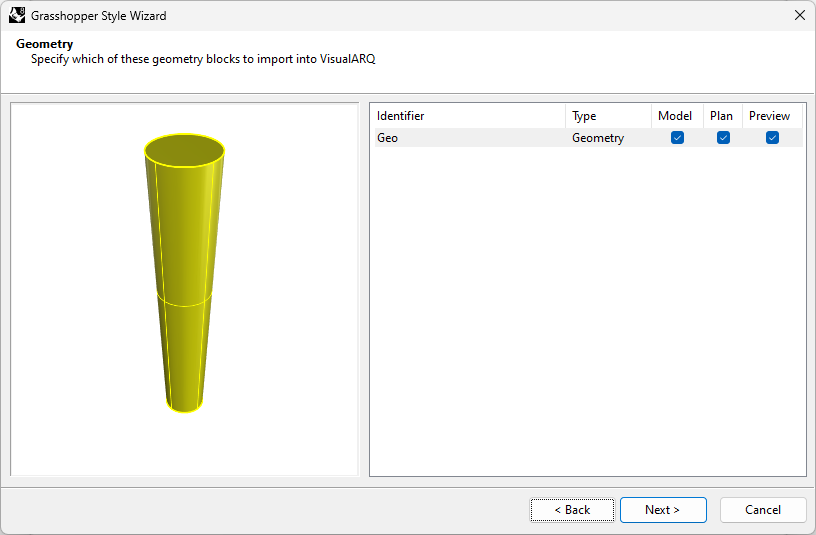
Specify which of the geometry blocks to import into VisualARQ. The names of these Geometry blocks are taken from the name of the output components params in the Grasshopper definition, and they can be edited in this step if desired.
Each component can be assigned to a different representation:
- Model: object representation in 3D.
- Plan: object representation in plan views when the Cut Plane of the level where the object is situated is enabled.
- Preview: geometry used to display the object while is being inserted or moved in the model.
2.5: Parameters
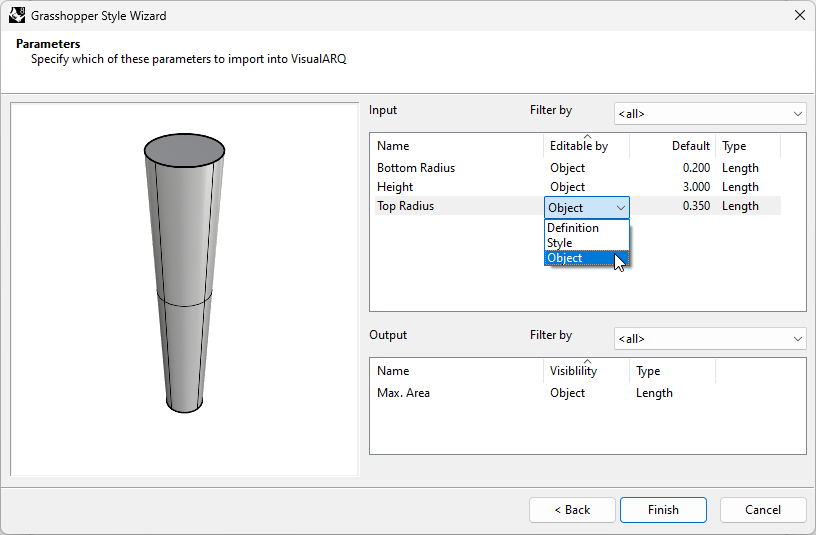
This step shows the settings available for the list of input and output parameters that define the object style:
Input parameters:
- Editable by:
- Definition: the parameter will be hidden in the VisualARQ style and properties dialogs.
- Object: the parameter can be edited separately for each element with that style in the model. However, parameters editable “by object” can also take the value defined “by style”.
- Style: the parameter can be edited by style, so the changes will apply to all elements with that style.
- Default: shows the default value. In the case the input parameter is a piece of geometry, an Unreferenced geometry text will show up in red color. You will need to click on the button and pick the corresponding geometry object in Rhino before moving forward. In case of a value list or a boolean toggle, a dropdown list with the corresponding options will be available.
- Type: shows the different types of values. If the input is a boolean value, a text, a geometry, or an integer number they will appear already with their corresponding type assigned. In the case of a floating point number (a decimal) you will be able to choose between one of the types below:
- Number: any floating point number that doesn’t fit in any of the following types.
- Length, Area and Volume: the value will be converted to the units of the document.
- Angle: the value will change from radians to degrees.
- Ratio
- Percentage: the value will be 100 times the one specified in the Grasshopper defintion.
- Scale
Output parameters:
- Name: it is the identifier of the parameter and can be modified if desired in this step.
- Visibility: choose the option “Object” to display this parameter in the VisualARQ dialogs, or “None” to hide it.
- Type: shows the type of value which has previously been defined in Grasshopper for this parameter.
The list of parameters displayed can be filtered by groups, in case they are located inside groups in the Grasshopper definition.
You can change the Editable by and Type settings at once from a multiple selection of parameters.
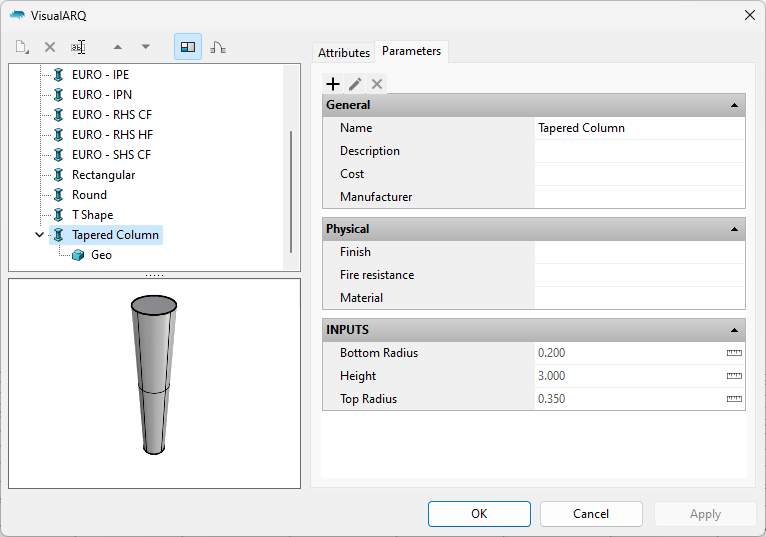
3. Insert and edit a VisualARQ object created from a Grasshopper style
3.1 Edit the style
Once the grasshopper style wizard is completed, the new style will appear in the object styles list. To edit the style again, right-click on the style name to open the context menu and select Edit. This operation will open the Grasshopper style wizard again.
3.2 Insert the Grasshopper style
Once the object style is created, you will be able to insert it in the model and change its parameters in the VisualARQ Properties section (in Rhino Properties
Panel, as any other regular VisualARQ object). Only those input parameters editable “by Object” will appear in the Properties panel.