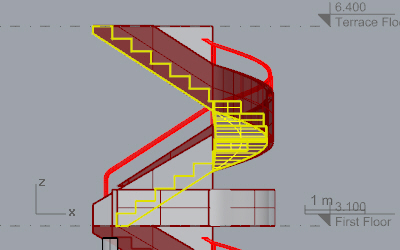
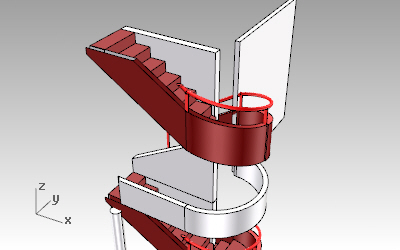
First floor stair
The process to create the first floor stair is the same as the one explained for the Ground floor stair. However you can take advantage of the work done and create this one in a faster way.Stair

- From the Top viewport, in Wireframe display mode isolate
 the ground floor stair, the stair fence and one of the walls that intersects perpendicularly with the stair in the first floor.
 - Move to the Right Viewport and _Copy
 the stair and the stair fences from the ground floor to the first floor (3 meters up)
 - Since the first floor stair is higher than the ground floor stair, you need to change its parameters. Select the first floor stair and change its height value from the object properties in Rhino properties dialog box
 . Set the height value to 3.3m. (Change also the height of the middle fence walls until they reach the first and terrace floor elevation respectively.)
Stair Fence
The first floor stair fence is already created. You just need to adjust it to the first floor height and solve the intersection with the nearby walls.
- Select the stair fence volumes and scale them in the vertical direction, with the _Scale1D command
 . (Hide the geometry of the ground floor afterwards for an easier workflow.)
 - Now you need to use the _vaWallSubtractSolid command
 to subtract a new solid from the middle fence wall in order to fit with the stair volume:
- Since the middle wall fence has already a solid subtracted, you need to recover it with the _vaWallExtractSolid command
 and use it for a new subtraction.
 - After extracting the solid from the wall, use the _MoveEdge
 command to adjust its shape to the stair volume.
 - Now run the _vaWallSubtractSolid command
 to subtract that modified solid from the middle fence wall.
- Since the middle wall fence has already a solid subtracted, you need to recover it with the _vaWallExtractSolid command
- _Trim
 the parts of the stair fence that are overlapping the perpendicular wall.
- Draw an auxiliary line
 from the Top Viewport aligned with the perpendicular wall.
 - Run the _Trim
 command to trim the parts of the stair fence with the auxiliary line created.
 - _Delete the auxiliary line.
- Draw an auxiliary line
