After creating a project with Rhino and VisualARQ and generating the documentation drawings such as the floor plans, sections, elevations, etc. you can export all the geometry to AutoCAD in a few steps:
- Save the document:
- All document: In the Rhino Menu go to File > Save as and specify a file name, directory and the .dwg file format to save the document.
- Specific geometry: Select the geometry in the model you wish to export, select the option Export selected in the Rhino Menu File and specify a file name, directory and the .dwg file type to save the document.
Click on the Save button. A new dialog will appear with the list of DWG/DXF Export options.
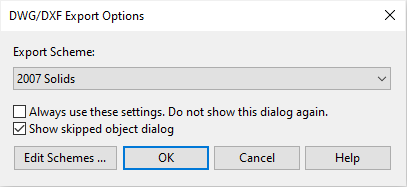
- DWG/DXF Export options dialog: Select 2007 Solids as one of the most commonly recommended export schemes, but click on the Edit schemes button to make sure the settings are correct for a proper export result. A new dialog will appear with the AutoCAD export schemes settings.
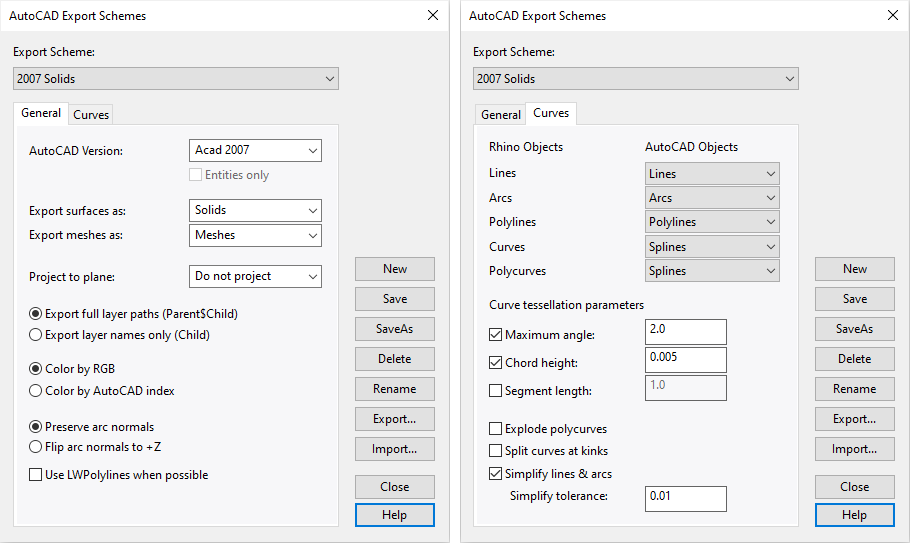
- AutoCAD Export schemes settings: In the image below you can see the most commonly used settings for the 2007 Solids scheme with a few changes. These are the most important settings to take into account:
- General Tab: Export Surfaces as Solids and Meshes as Meshes.
- Curves Tab: Export Lines as Lines, Arcs as Arcs, Polylines as Polylines, and Curves and Polycurves as Splines.
- Save the Export schemes: Click Save or Save as on the right side of the dialog if you wish to use this edited Export scheme next time you export in the .dwg file type.
- End: Click on the Ok button to quit the dialog. The file is finally created and ready to be used in AutoCAD.